Author: admin

  • Essential Tips for Gym Mirror Installation

    Essential Tips for Gym Mirror Installation

    Installing a gym mirror is one of the best upgrades for a home gym, but it’s nothing like hanging a picture frame. Done right, the result is safe, professional, and motivating. Done wrong, it’s a genuine household hazard. This guide provides a clear plan to get it done correctly.

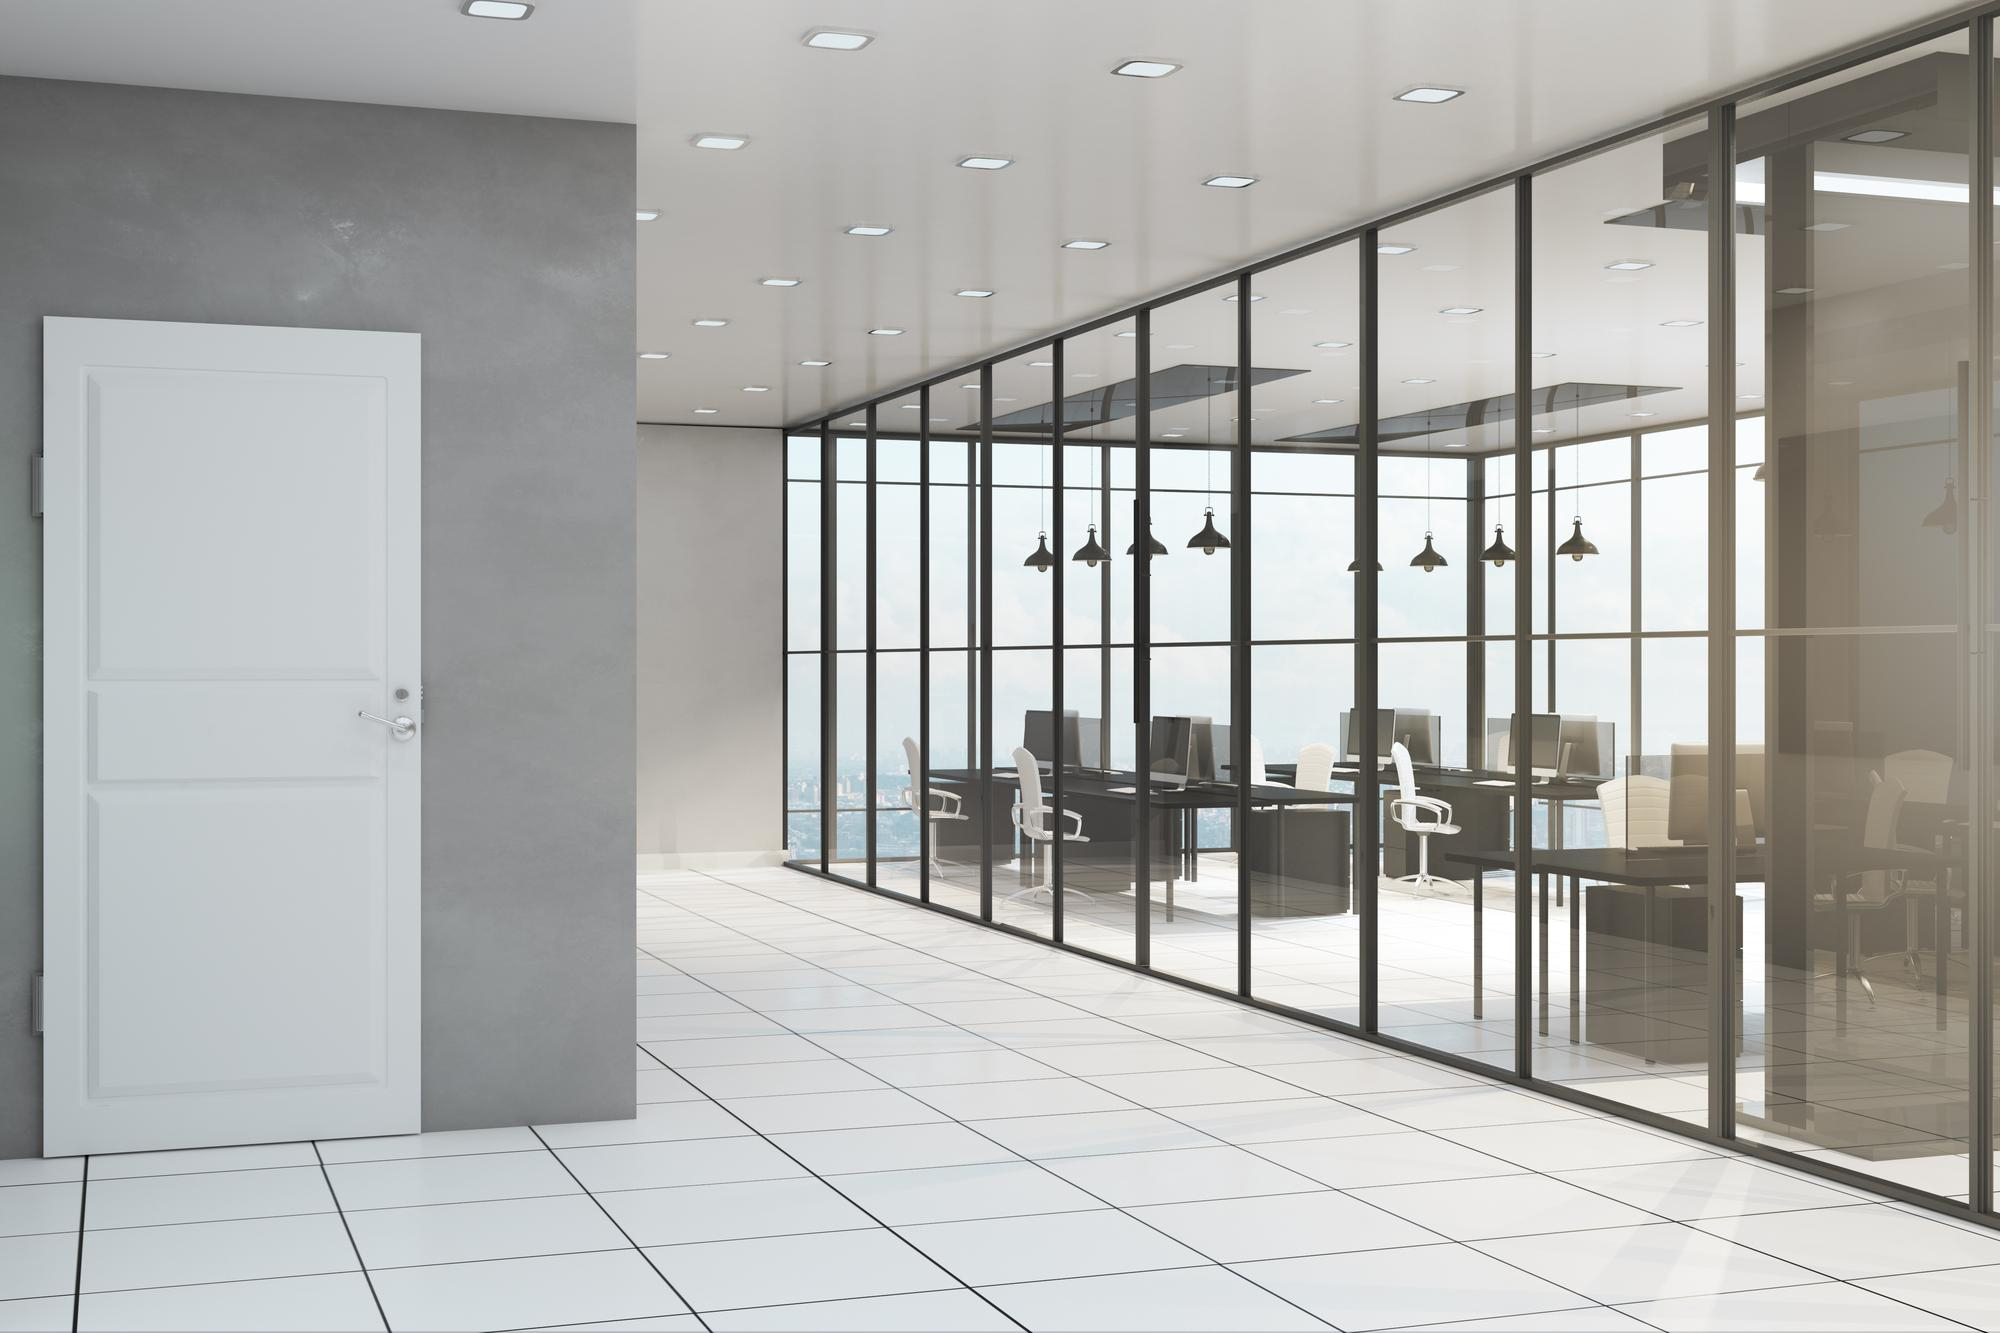
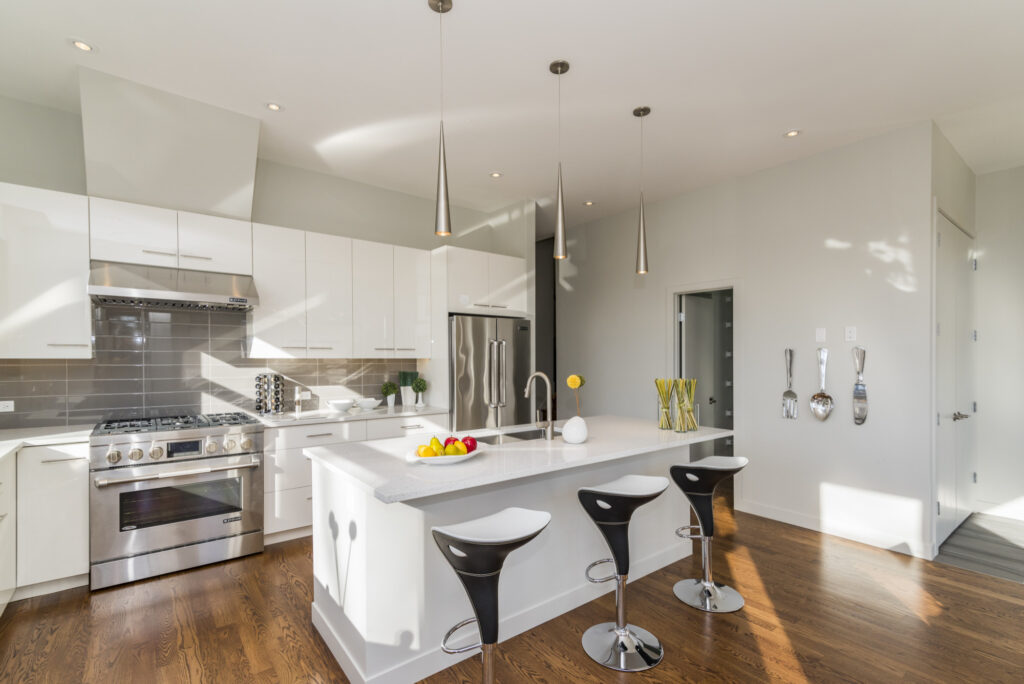
    Seeing your reflection is one of the most effective ways to self-correct form, prevent injury, and maximize every movement. A wall of home gym mirrors instantly makes any room feel like a dedicated training facility, boosting focus and motivation.

    The challenge is the mirror itself. A large, unframed sheet of glass is heavy and surprisingly fragile during handling. The primary risk of any gym mirror installation is catastrophic failure from improper mounting, which can lead to serious injury from falling glass. This isn’t a project where you can afford to guess.

    You don’t have to guess. This guide covers every critical step, from choosing the right hardware to safely lifting and securing the glass. With proper preparation, you can confidently achieve a flawless and secure DIY home gym mirror wall.

    DIY or Hire a Pro? How to Make the Right Call

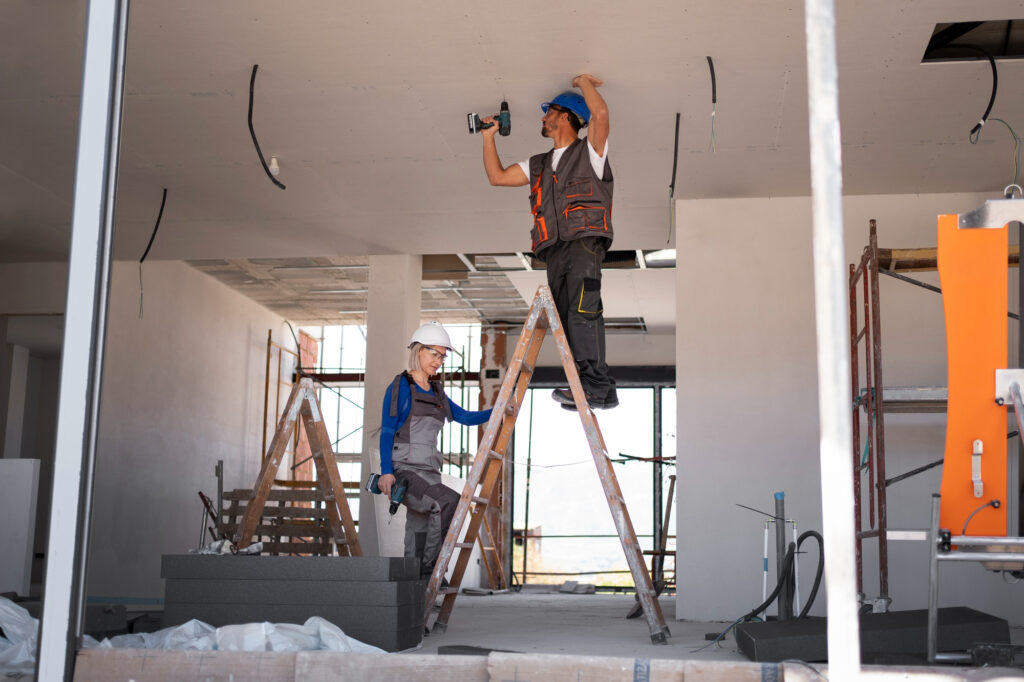
    This project demands respect. Before attempting to hang a large wall mirror by yourself, honestly assess if this is a manageable DIY job or one for the pros. Getting gym mirror installation wrong isn’t just frustrating—it can be dangerous and costly.

    To make the right call, ask yourself these three critical questions:

    • Is the mirror larger than 20 sq. ft. (e.g., a 4’ x 5’ panel)? Anything bigger becomes extremely heavy and unwieldy for non-professionals.
    • Do you have a strong, reliable helper? This is a two-person job, period. One person cannot safely lift and position a large mirror.
    • Are you comfortable and accurate with a stud finder, a level, and a drill? These are the absolute minimum tools for a secure installation.

    If you answered “no” to any of those questions, we strongly recommend hiring a professional. The risk of a shattered mirror or an insecure mount is too high. Professional installation typically costs $150 to $400, depending on mirror size and wall type. This fee buys you expertise, the right tools, and peace of mind.

    Whether you tackle it yourself or call an expert, the next step is determining the right size and type of mirror for your workout space.

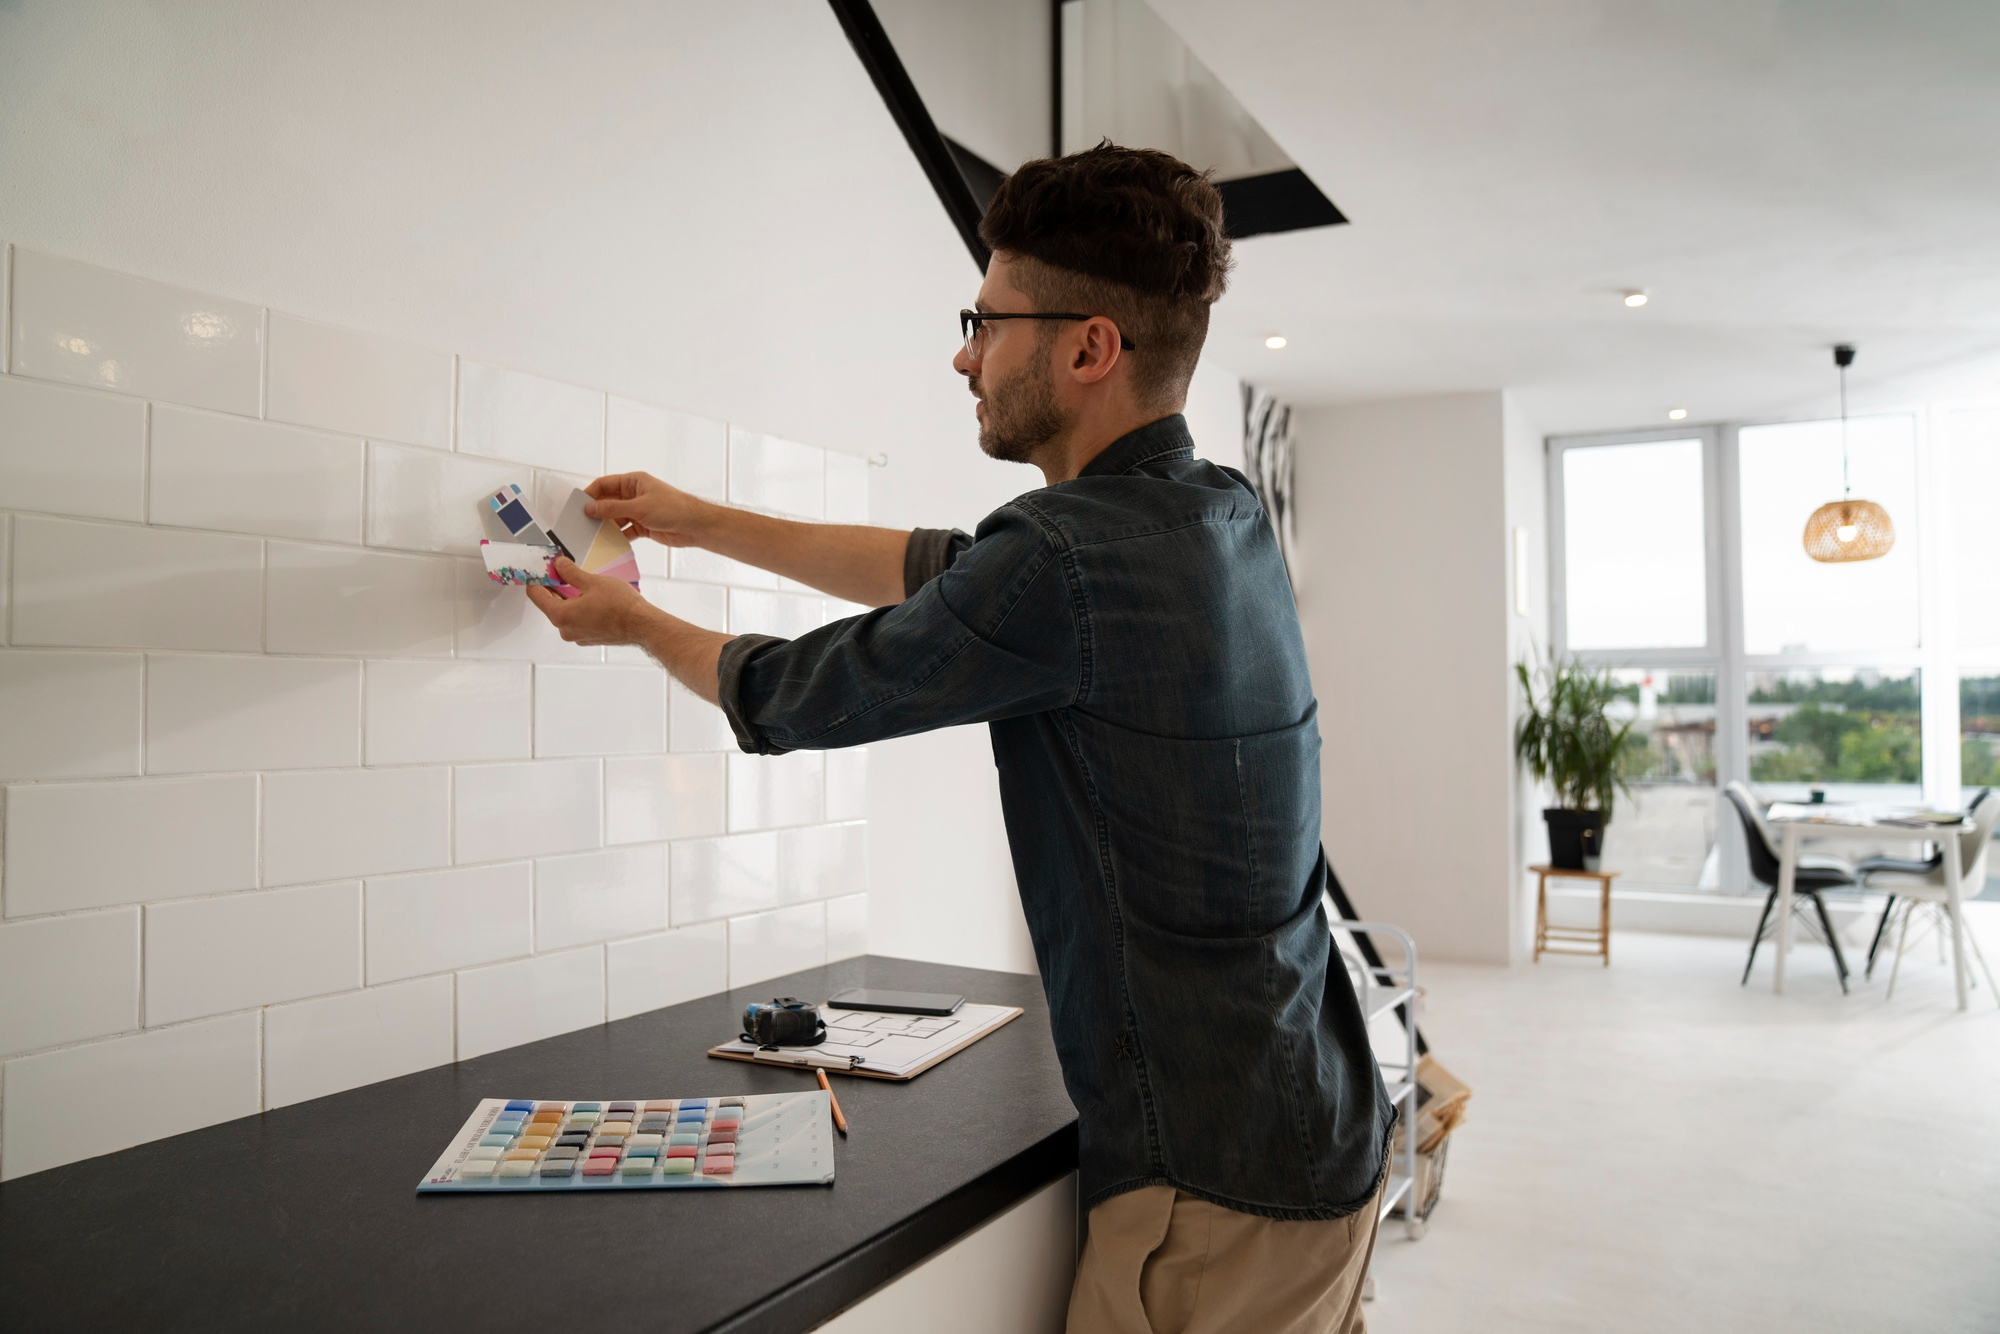
    What Size and Type of Gym Mirror Do You Actually Need?

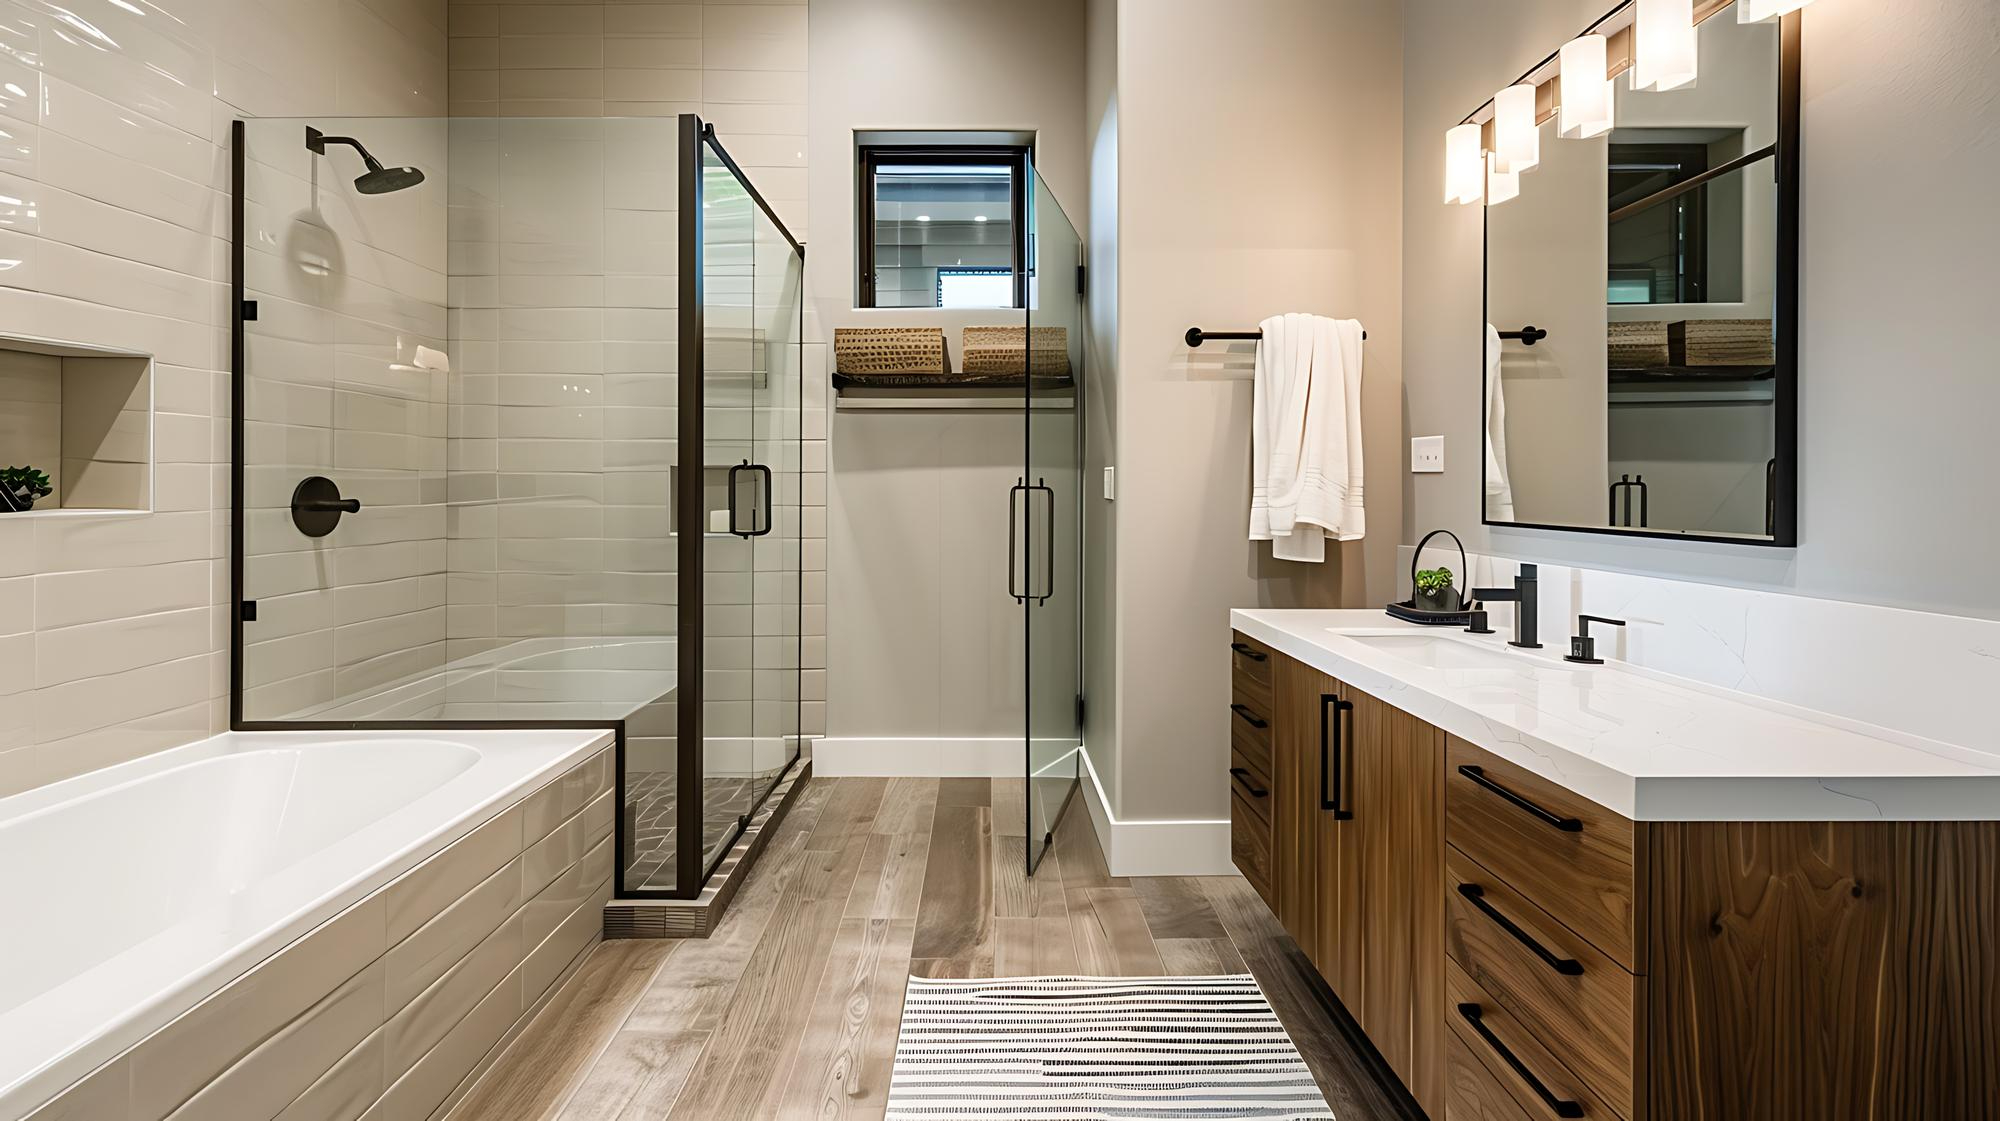
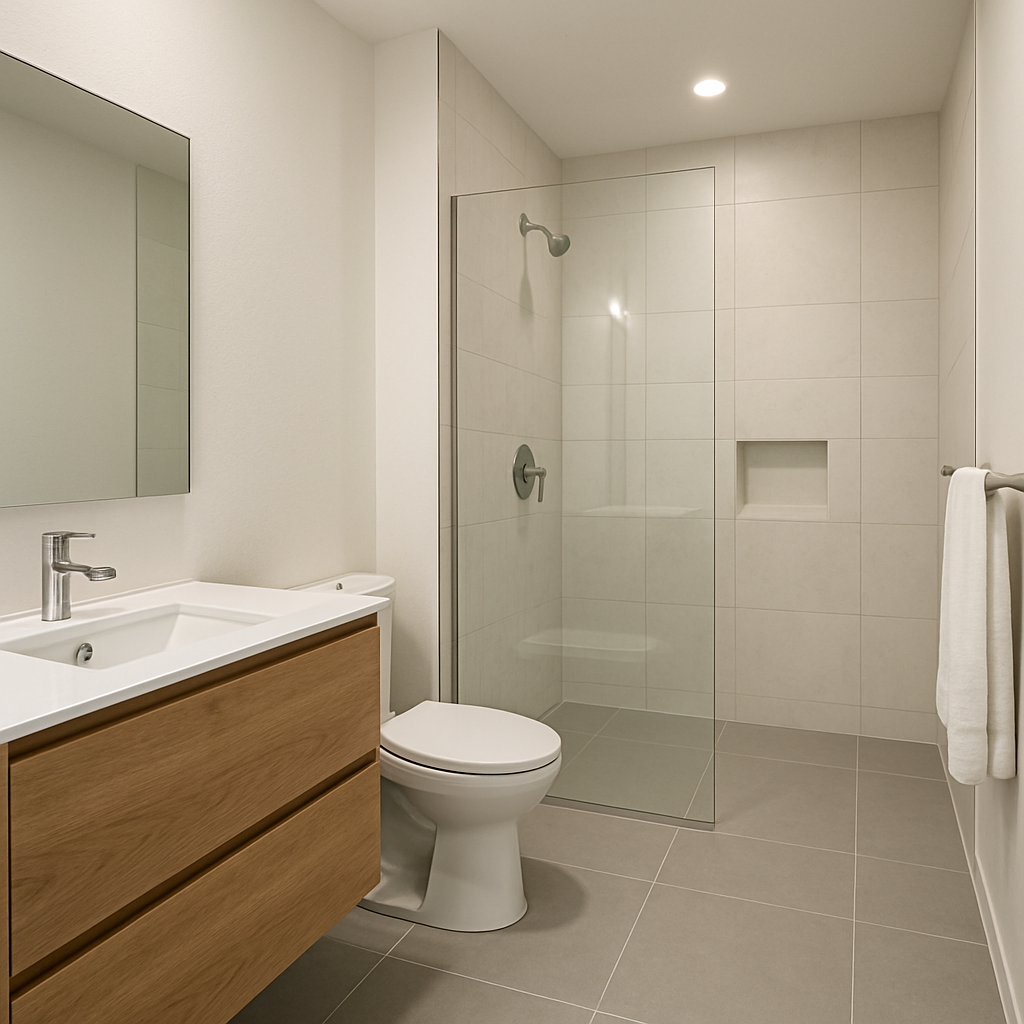
    Choosing the right mirror isn’t just about covering a wall; it’s about getting a clear, accurate view of your entire body in motion. For most home gyms, the key is height, not just width. To see yourself from head to toe, the bottom edge of the mirror should be mounted about 18-24 inches off the floor. A mirror that is at least 5 feet tall will then provide a complete view for almost anyone.

    The next consideration is mirror thickness, which directly impacts the quality of your reflection. A thin, cheap mirror will flex slightly, creating a warped, “funhouse” effect known as reflection distortion. The standard for a professional, distortion-free gym mirror is 1/4-inch (or 6mm) thickness. Anything less risks compromising the very reason you’re installing it: to get an accurate look at your form.

    Beyond a clear image, your top priority must be safety. Always order your mirror with safety backing, a film applied to the back of the glass. Think of it like a car windshield—if the mirror ever breaks, the backing holds the dangerous shards together instead of letting them shatter across your floor. In a space with heavy weights and dynamic movement, this feature is non-negotiable.

    With these specifications in mind—proper mounting height, 1/4-inch thickness, and safety backing—you’re ready to order a mirror that is both effective and safe.

    Your Complete Tool and Materials Checklist Before You Start

    Gathering all your tools and materials beforehand will make the installation smooth, safe, and professional. Here are the essentials for mounting your fitness mirror:

    • Stud finder
    • 4-foot level (a shorter one is harder to use for a large mirror)
    • Drill with appropriate bits
    • Tape measure
    • Caulking gun
    • Mirror Mastic (ensure it’s for mirrors)
    • J-channel (an aluminum track for the bottom)
    • Mirror clips (for the top edge)
    • Safety glasses and gloves
    • Painter’s tape

    Of all the items on this list, two are absolutely crucial. First is mirror mastic, a special adhesive designed to be gentle on a mirror’s reflective backing. Do not use regular construction adhesive like Liquid Nails, as chemical solvents can eat through the silvering and permanently ruin your mirror. Second is the J-channel. This metal track acts as a sturdy shelf that supports the mirror’s entire weight, while the mastic and clips simply hold it flush against the wall.

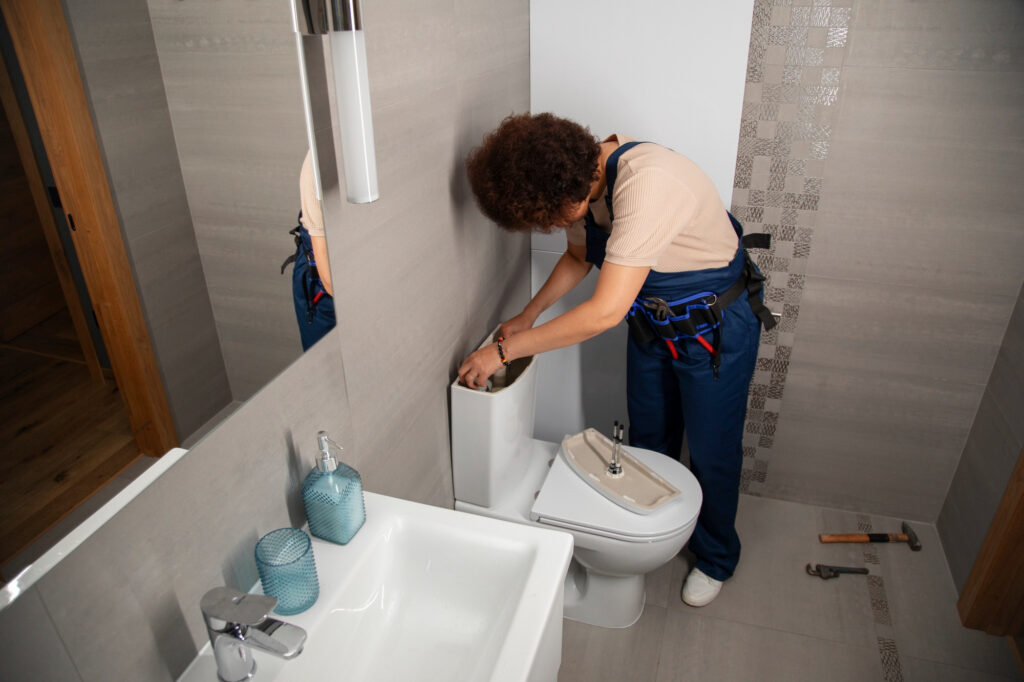
    How to Install the J-Channel: The Most Critical Step

    With your tools ready, it’s time to prepare the wall. This step is vital for installing frameless mirrors, as it ensures a perfectly level and secure base. Think of the J-channel as the foundation of a house—if it isn’t straight and strong, nothing on top of it will be right. The goal is to find the wall studs, the hidden wooden beams that provide the necessary strength.

    Begin by deciding the height for the bottom of your mirror. Using your electronic stud finder, slide it horizontally across the wall in that area. When the device beeps or lights up, you’ve located a stud. Mark the center of each one with a pencil. Do not skip this; screwing the channel directly into drywall is not strong enough to support the mirror’s weight.

    Next, draw a perfectly straight line to guide the installation. Place your 4-foot level on the wall at your desired height. Adjust it until the bubble is exactly centered, then draw a crisp, continuous line along the top edge of the level. This single line guarantees your J-channel is perfectly horizontal.

    Now, align your J-channel with the pencil line, ensuring the channel’s bottom trough sits on the line. Use your drill to fasten the channel to the wall with screws, making sure each screw goes directly into a stud. Once secured, give it a firm tug. It shouldn’t budge. With your support channel firmly in place, you’re ready for the next step.

    Applying Adhesive & Safely Mounting the Mirror

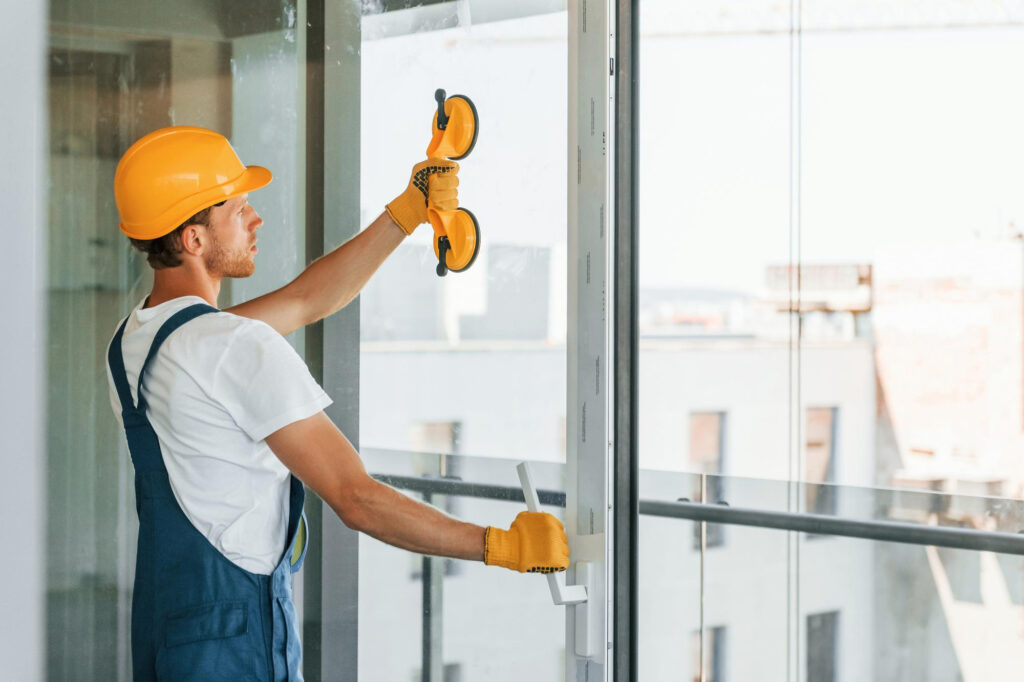
    Before applying glue, perform a “dry fit.” This is a professional secret for a flawless DIY home gym mirror wall. With a partner, carefully lift the mirror and set it into the J-channel, tilting it against the wall. Does it fit perfectly? Is it level? This five-minute rehearsal is your last chance to catch measurement errors before they become permanent. Once you confirm the fit, carefully remove the mirror and set it on a soft, protected surface.

    With the dry fit complete, apply the best adhesive for gym mirrors: mirror mastic. On the back of the mirror, apply the mastic in vertical, wavy lines about 6 inches apart, leaving a 3-inch border around the edges. This pattern creates “air chimneys,” allowing air to circulate and moisture to escape, preventing mold and adhesive failure.

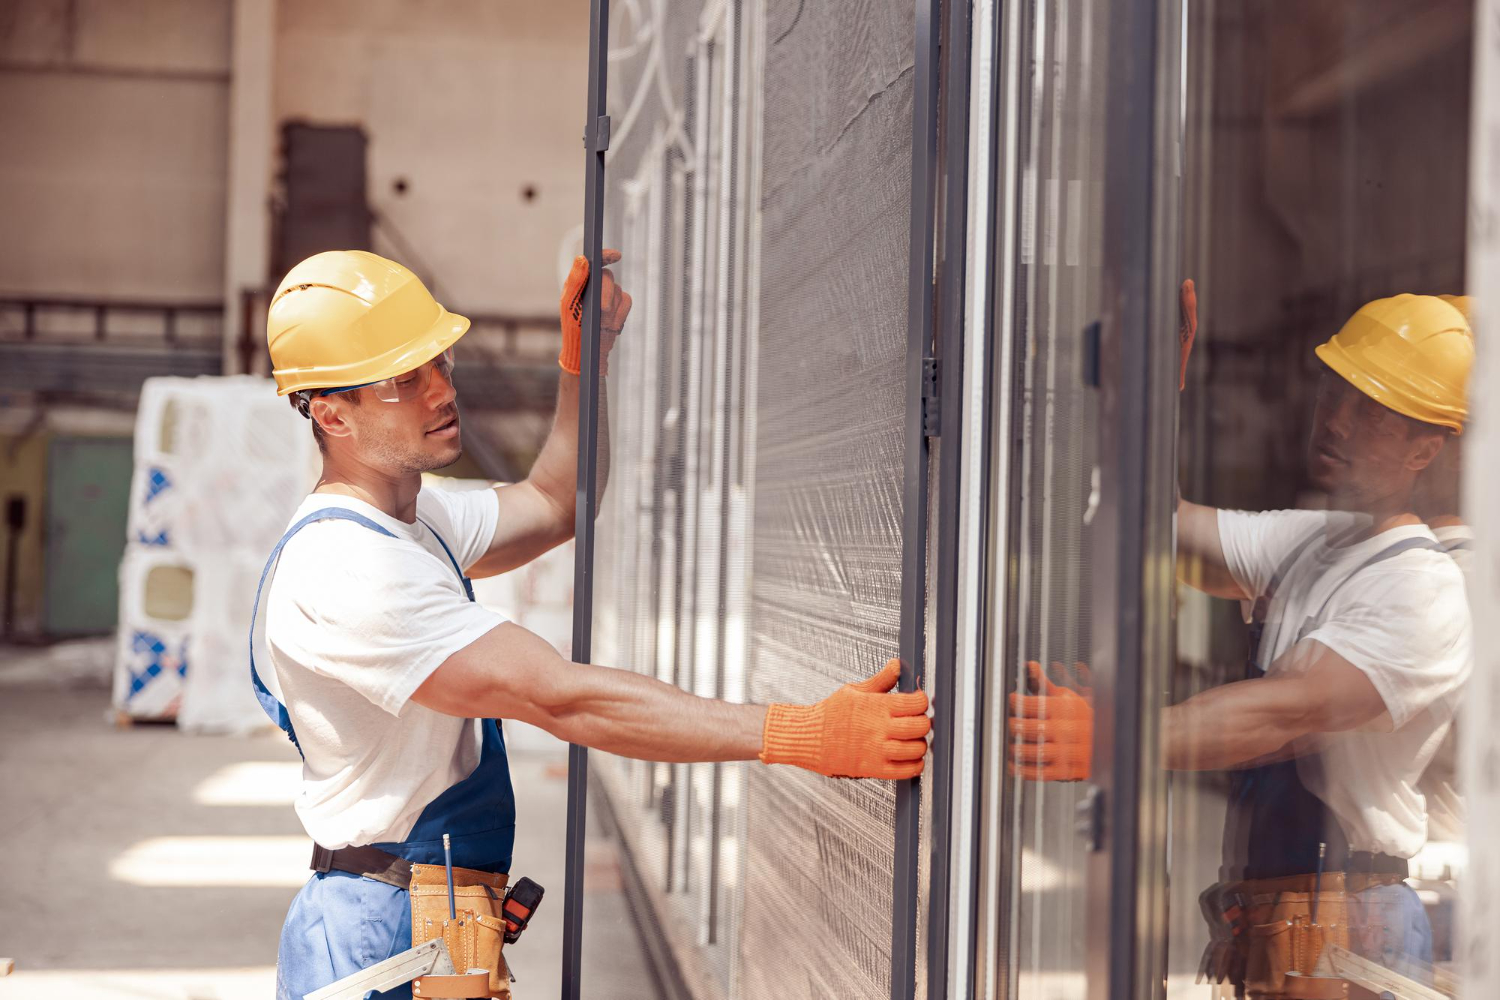
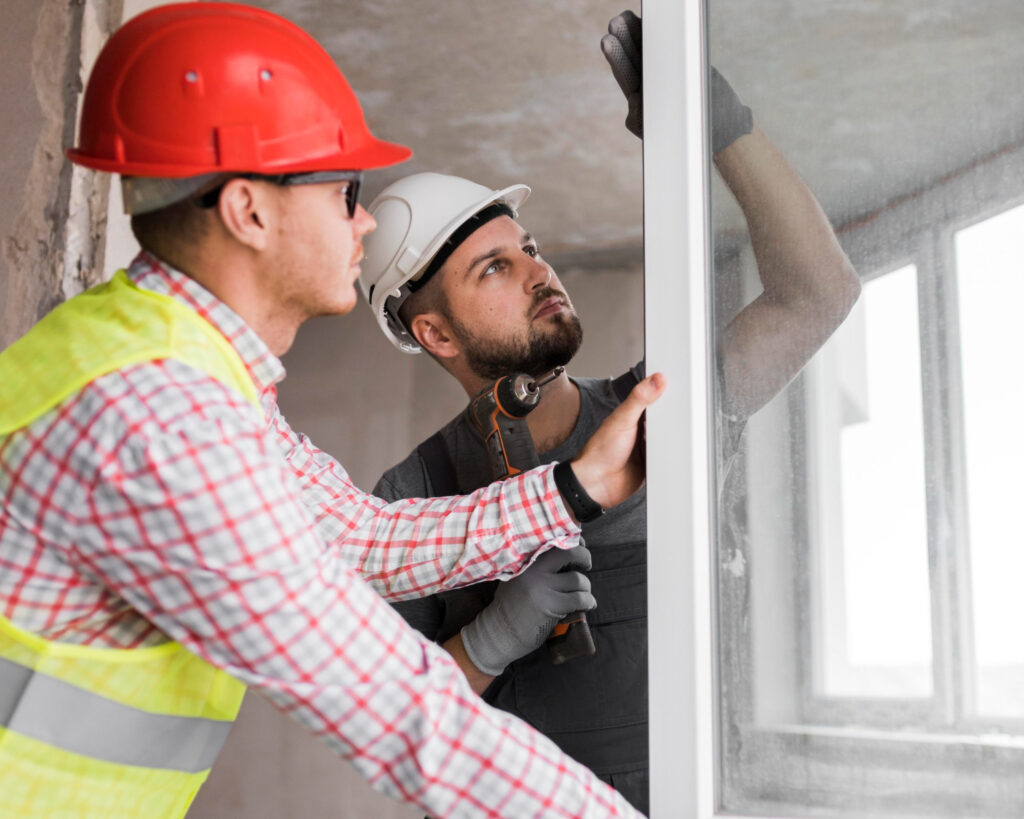
    Now for the most important safety step: the two-person lift. This is non-negotiable. With one person on each side, get a firm grip on the mirror’s edges or use heavy-duty suction cups. Plan your path, communicate clearly, and lift with your legs. Move slowly toward the wall, keeping the mirror as vertical as possible to avoid stress on the glass.

    Working together, guide the bottom edge of the mirror directly into the J-channel. Once it’s resting securely, gently tilt the top of the mirror forward until it contacts the mastic. Press firmly and evenly across the mirror’s surface for about one minute to ensure solid contact. The J-channel will fully support the weight.

    The Final Lock: Securing the Top and Sides of Your Mirror

    Your mirror is on the wall, but the installation isn’t complete. The mastic needs 24-48 hours to fully cure. To prevent the mirror from tipping forward and to add permanent safety, you must lock in the top edge. This final mechanical fastening is what makes an installation truly secure.

    The most DIY-friendly method is using mirror clips. To install them, rest a clip on the top edge of the mirror flush against the wall. Mark the screw location, slide the clip aside, and drill a pilot hole. Gently screw the clip into place until it’s snug. The goal is to hold the mirror, not to clamp it down, which could crack the glass.

    When securing the clips, leave a tiny space between the clip and the mirror face, about the thickness of a credit card. This is an expansion gap. Walls and mirrors expand and contract with temperature changes, and this gap gives the mirror room to move without building up stress. Without it, you risk mysterious cracks appearing later. The clip’s job is to prevent tipping, not to pin the mirror against the wall.

    For a completely frameless look, some installers use dabs of mastic instead of top clips, but this is an advanced technique. For a DIY project, clips are the safest and most reliable method for securing heavy mirrors, providing immediate security and long-term peace of mind.

    Pro Tips to Avoid Distortion, Black Spots, and Breakage

    A common issue is a ‘funhouse’ effect where your reflection looks wavy. This usually means your wall isn’t perfectly flat. To prevent mirror distortion, hold a long, straight level against the wall before you install. If you see significant gaps, the mirror will bend to that shape. For very uneven walls, you may need to reconsider the location or consult a pro.

    Another long-term problem is ‘black spots’ appearing behind the glass. This is the silver backing being eaten away by the wrong glue. Standard adhesives contain harsh chemicals that destroy the reflective layer. Using only a proper gym mirror adhesive (mastic) is non-negotiable, as it’s formulated to be safe for the delicate backing.

    If your wall is too uneven or the mirror is in a high-traffic area, consider shatterproof acrylic mirror alternatives. This lightweight plastic won’t break on impact. While acrylic is safer and provides a clear reflection, it can scratch more easily than glass, so it requires special care when cleaning. It’s a trade-off between durability and scratch resistance.

    Paying attention to these details—your wall, adhesive, and material—ensures the mirror looks great and stays safe for years.

    Your New Gym Is Ready: Admire Your Handiwork

    That massive sheet of glass is no longer an intimidating mystery. You’ve learned how to measure, level, and secure gym wall mirrors, transforming a blank wall into a professional-grade feature that makes your space feel bigger and brighter.

    Before you step back to admire your work, run through this final safety confirmation:

    • Solid Support: Your bottom J-channel is anchored directly into wall studs.
    • Correct Adhesive: You used only mirror-safe mastic, not a generic glue.
    • Secure Top: The mirror is firmly held in place at the top with clips or adhesive.

    You didn’t just hang a mirror; you invested in your fitness and skillfully completed a challenging project. This upgraded DIY home gym is a testament to what you can accomplish. Now, it’s time to enjoy the results of your hard work.

  • Maintenance Tips for Frameless Wall Installations

    Maintenance Tips for Frameless Wall Installations

    Ever scroll through Pinterest and stop at a photo of a stunning, minimalist room, wondering what makes it feel so sleek and uncluttered? The secret is often hidden in plain sight. It’s the art of making door frames, window casings, and baseboards disappear, a style officially known as “frameless” or “trimless” design.

    This isn’t just about removing old trim; it’s a sophisticated system for creating perfectly clean edges where surfaces meet. By eliminating the visual interruption of molding, these modern walls allow spaces to feel larger and more unified, a technique central to high-end minimalist design. The effect transforms a simple wall from a backdrop into a seamless architectural feature.

    Achieving this flawless look requires a surprising level of skill—and a specific budget. This guide breaks down the magic behind frameless walls, from the aesthetic benefits to the technical details, revealing the secret behind the cleanest, most sophisticated rooms on your feed.

    Why Ditching Trim Makes Your Space Feel Larger and Cleaner

    The stunning effect of a frameless room isn’t just about a modern look; it’s rooted in a powerful design principle called visual continuity. By removing the traditional “visual stop signs” of trim and molding, your eye travels smoothly across surfaces, fundamentally changing how a space feels. This approach is one of the best alternatives to traditional walls for anyone seeking an uncluttered aesthetic.

    By clearing away the visual noise, you unlock three distinct advantages:

    • Uninterrupted Sightlines. Your gaze flows from wall to floor to doorway without interruption. This simple trick makes the brain perceive the room as larger and more expansive, a core principle behind many successful minimalist room divider ideas.
    • No More Dust Ledges. Practically speaking, eliminating baseboards and chunky door casings means getting rid of horizontal surfaces where dust and grime love to collect, instantly simplifying your cleaning routine.
    • A Brighter, More Open Feel. Smooth, unbroken walls act like a clean canvas. This helps to increase natural light as it reflects more evenly across the room, making the entire space feel brighter and more airy.

    But if you get rid of the trim that normally hides the edges of the drywall, what keeps everything looking so clean and sharp?

    What Replaces the Wood Trim? The Secret Behind the Seamless Edge

    So, if there’s no wood trim to hide the gap between the wall and the door, what stops it from looking unfinished? The solution is surprisingly elegant. Instead of covering the raw drywall edge, a reveal bead is installed first. This is a small metal or vinyl channel that creates a perfect, crisp slot for the drywall to tuck into, forming a durable and impossibly clean edge. It’s a hidden workhorse that makes the entire look possible.

    This clever component is designed to produce what architects call a shadow line or “reveal”—the narrow, intentional gap you see between the wall and the door frame or floor. As the close-up image shows, this small recess creates a dark, crisp shadow that cleanly separates the two surfaces. The effect delivers a high-end, architectural feel, and the uninterrupted sightlines share some of the same visual tempered glass wall benefits, making a space feel more open and cohesive.

    Crucially, this seamless look isn’t something you can easily add to an existing room. Achieving beautiful frameless walls requires a planned system where everything is precisely aligned from the start. The level of accuracy required is comparable to a flawless floor to ceiling glass panel installation—it demands skilled labor and must be integrated before the drywall is even hung. It’s this upfront planning that delivers the stunning, high-end result.

    Beyond Doors: 3 Places to Use Frameless Design for a High-End Look

    While a frameless door makes an immediate statement, applying this clean-edge philosophy throughout a home is what truly creates a cohesive, minimalist feel. The same reveal bead technique can be used in some surprising places, turning functional elements into seamless architectural features.

    One of the most impactful applications is the floating baseboard. Instead of a traditional wood baseboard sitting on top of the flooring, the wall itself stops just short of the floor, creating a recessed shadow line at the bottom. This subtle detail gives the illusion that the wall is hovering, a key feature of ultra-modern walls that also has a practical benefit: there’s no ledge to collect dust.

    The same principle transforms windows. A trimless window return eliminates the bulky wood casing, allowing the drywall to run directly to the window’s frame. This turns the window into a simple, clean opening, almost like a piece of art hung on the wall. The view outside becomes the undisputed focal point, maximizing light and making the space feel more connected to the outdoors.

    For those committed to ultimate minimalism, the frameless approach can extend to the smallest details, such as air vents, outlets, and light switches that sit perfectly flush with the wall. This pursuit of uninterrupted surfaces is what often leads designers to explore frameless glass partitions.

    What About Glass? Using Frameless Partitions to Divide a Space Without Sacrificing Light

    The pursuit of clean lines often leads to a common question: what happens when you need a new room but don’t want to build a solid, view-blocking wall? This is where frameless design takes a different form. Instead of hiding transitions with drywall, frameless glass partition walls use massive panes of glass to create separation you can see right through. It’s the perfect solution for maintaining an open concept feel while carving out functional, dedicated spaces.

    Unlike a standard window, these interior glass partition systems often run from floor to ceiling, held in place by minimal, almost invisible channels. Made from thick, tempered safety glass, they define a room’s boundary while letting light pour through unobstructed. You get the visual connection of one large space with the practical benefit of acoustic separation—a quiet zone for work or relaxation without feeling boxed in. For ultimate flexibility, many setups incorporate sliding glass wall systems that can open up the space entirely.

    Imagine turning a corner of your living room into a quiet home office. With one of these glass partitions, you can take a call in peace without sacrificing the natural light from the main room’s windows. This sophisticated approach divides function, not light or volume. But achieving this seamless integration, whether with glass or a hidden drywall door, hinges on one critical, non-negotiable element: the perfection of the surfaces around it.

    The Big Catch: Why a Perfect Frameless Wall Requires a Master-Level Finish

    That call for surface perfection is where the biggest secret of this minimalist style lies. Standard trim, like baseboards and door casings, isn’t just for decoration; it’s a clever trick builders use to hide the inevitable gaps, cracks, and uneven edges where drywall meets another surface. When you decide to create a frameless wall, you’re removing that forgiving frame. Suddenly, the wall itself has nowhere to hide, and every tiny bump, wave, or imperfection is put on full display under a harsh spotlight.

    This is why a flawless look demands something called a “Level 5 finish,” the absolute highest grade in drywall work. Unlike a standard wall that is only smoothed out at the joints, a Level 5 finish involves applying a skim coat of compound over the entire surface. It’s then meticulously sanded and primed to create a perfectly flat, uniform plane that feels as smooth as glass. Think of it this way: trim is a bulky picture frame that can hide a slightly crooked edge, but without it, the artwork—your wall—must be absolutely flawless.

    Achieving this buttery-smooth surface is a true art form, making it a job for highly specialized drywall finishers, not a weekend DIY project. While modular systems like demountable partition walls are designed for clean installation, building a permanent, trimless wall is a far more demanding craft. This level of obsessive detail and craftsmanship is what separates a good result from a breathtaking one, and as you might guess, it has a significant impact on your budget.

    How Much More Does the ‘No-Trim’ Look Really Cost?

    Let’s get straight to the point: achieving this clean, architectural look is a significant investment. As a general rule, you can expect the cost for a fully trimless wall and door installation to be two to three times more expensive than a standard, trimmed-out equivalent. This isn’t a small upgrade; it’s a fundamental shift in the construction process that demands an entirely different level of precision from start to finish.

    Surprisingly, the biggest part of that extra cost doesn’t come from the materials themselves. The primary driver is the intensive, highly skilled labor required for that flawless Level 5 finish. You aren’t just paying for drywall and compound; you’re paying for an artisan’s time to meticulously sculpt a perfectly flat surface across the entire wall. It’s the difference between a quick paint job and commissioning an artist to create a smooth, gallery-quality canvas.

    Beyond the walls, the hardware also adds to the budget. To maintain the seamless look, you’ll need specialized components like flush-mount door jambs that disappear into the wall and hidden, “invisible” hinges. These high-performance parts, crucial for creating the illusion that both solid and frameless glass doors are floating, are engineered to much tighter tolerances and naturally carry a higher price tag than their conventional, visible counterparts.

    Ultimately, the final price reflects a move away from standard building practices toward meticulous, custom craftsmanship. You’re investing in the hours of expert work required to make trim—and all the visual clutter it hides—simply disappear. This high-end result raises the final, crucial question: given the cost and complexity, is a frameless design the right choice for you?

    Is a Frameless Design Right For You? A 3-Point Checklist

    Understanding the deliberate choices required to create these truly modern walls empowers you to decide if this style truly fits your vision and your wallet. Use this quick checklist to make your final call.

    Your Frameless Checklist:

    1. Your Aesthetic: Do you strongly prefer clean, modern, and minimalist design over traditional or decorative styles?
    2. Your Budget: Are you prepared to invest significantly more in specialized labor for a flawless finish?
    3. Your Project Scope: Is this a new build or a major gut renovation where wall surfaces will be redone from scratch?

    If you answered “yes” to all three, you’re ready for an informed conversation. Your next step is to find a contractor and specifically ask to see their portfolio of “trimless” and “Level 5” projects. You now have the language to not just admire this look, but to build it.

  • Understanding the Benefits of Curtain Walls

    Understanding the Benefits of Curtain Walls

    Look at any modern city skyline. Gleaming towers of glass seem to defy gravity, stretching hundreds of feet into the air. But the massive glass wall on the tallest skyscraper isn’t actually holding the building up. In fact, it’s just hanging there, like a giant, high-tech curtain.

    This is the core idea behind a building facade system known as the “curtain wall.” Architects call it this because the entire exterior wall hangs from the building’s main structure, much like a curtain hangs from a rod above a window. It doesn’t support the weight of the floors or the roof; it only has to support itself and stand up to the weather.

    Think of a modern building as having a skeleton and a skin. The real strength comes from an internal frame of steel or concrete—the skeleton—that does all the heavy lifting. The curtain wall is the building’s high-performance skin, a lightweight layer designed for looks and protection, not for brute force. This separation freed architects from structural constraints, allowing for the floor-to-ceiling views, light-flooded interiors, and sleek aesthetics that define our cities.

    The Raincoat for a Building: What Is a Curtain Wall, Really?

    For most of history, a building’s walls did two jobs: they held up the roof and kept the weather out. But modern skyscrapers play by a different set of rules by separating these tasks. The internal frame handles the structural load, leaving the exterior to be a protective skin.

    This outer skin is what professionals call a curtain wall. Because it doesn’t support the building’s weight, it’s known as a non-load-bearing structure. Its main job is to act as a high-performance barrier against wind, rain, and temperature changes—think of it as a sophisticated raincoat for the building. This lightweight aluminum frame facade system is engineered to protect everything and everyone inside from the elements while only needing to support its own weight.

    This division of labor didn’t just change how buildings stand up; it completely transformed the way they feel to be inside, paving the way for a new era in architectural design.

    More Light, Better Views: How Curtain Walls Create Our Modern World

    Separating a building’s skeleton from its skin solved a problem that had frustrated architects for centuries: how to let in more light. In a traditional, heavy wall that holds up a building, every window is a hole that weakens the structure. This is why older stone and brick buildings usually have smaller, separate windows—the walls simply couldn’t support massive openings. The desire for a sun-filled room was always in a fight with the laws of physics.

    Curtain walls, however, completely flip this logic. Because they don’t carry any of the building’s weight, they can be made almost entirely of lightweight materials like glass. This is the secret behind the breathtaking, floor-to-ceiling windows and panoramic views you see in modern apartments, hotels, and offices.

    This newfound freedom gives so many modern buildings their sleek, futuristic look. Instead of being limited to heavy masonry, designers can create seamless facades using vast panels of glass held in a slender aluminum grid. And modern glass provides more than just a view; it’s often high-tech, with special coatings and layers that help keep the building comfortable year-round, representing a huge step forward in improving the thermal performance of glass facades. The result is the gleaming city skyline we know today, but not every building with a lot of glass uses a true curtain wall.

    Is It a Curtain Wall or Something Else? Spotting the Key Differences

    Not every glass-covered building uses a curtain wall. Architects have a few different tools for creating glassy facades, and learning to spot the main two alternatives—the window wall and the storefront system—is easy once you know what to look for.

    The most common look-alike on mid-rise residential towers is the window wall. Instead of hanging like a single sheet over the face of the building, a window wall system is installed between the concrete floor slabs on each level. This creates a distinct, stacked appearance. If you can clearly see a strong horizontal band of concrete or metal at every floor line, you are likely looking at a window wall.

    A true curtain wall, by contrast, creates a more seamless, continuous skin. The frame is installed on the outside of the building’s floor structure, often creating an unbroken vertical look that soars up the building. This is the key visual difference: a window wall sits inside the floors, while a curtain wall hangs in front of them.

    Finally, there’s the storefront system. This one is the easiest to identify because you’ll almost never find it above the first or second story. As the name suggests, it’s designed for ground-level applications like retail entrances and lobbies. It’s a lighter-duty system built to handle foot traffic, not the high winds and harsh weather found on the 30th floor. While all three use glass and metal, their placement on the building tells the real story.

    Meet the ‘Bones’ of the Glass Skin: Mullions, Glazing, and Spandrel Panels

    From a distance, a curtain wall can look like a single, seamless sheet. But get closer, and you’ll see it’s a highly organized grid. The metal beams that form this framework—both the vertical and horizontal ones—are called mullions. Think of them as the lightweight skeleton for the glass skin, creating the strong grid that holds everything in place. The large glass panels that fit into this frame are known in the architectural world as glazing.

    This system also solves a clever visual problem: how to hide the building’s actual floors and columns. If the whole wall were transparent, you’d see the messy edges of concrete slabs and structural beams. To maintain a sleek, uniform look, architects use special opaque panels called spandrel glass. This is simply glass that has been made non-transparent, often with a ceramic coating on the back, to perfectly conceal the structure behind it. It’s a design trick that creates the illusion of an all-glass tower.

    Together, these parts work as an integrated system. The mullions provide the structure, the glazing provides the light and views, and the spandrel glass provides the camouflage. Understanding these individual components helps explain how these massive facades are assembled so efficiently.

    LEGOs on a Skyscraper: How Giant Glass Walls Are Installed So Quickly

    Assembling a complex grid of metal and glass hundreds of feet above a busy street seems like an impossibly slow task. Yet, entire floors of modern skyscrapers can be wrapped in their glass skin in just a few days. The secret to this speed lies in the construction method, which comes in two main flavors.

    Crews on-site can use one of two primary approaches: the Stick-Built System or the Unitized System.

    • Stick-Built: The frame is assembled piece-by-piece—or stick-by-stick—directly onto the building. First the mullions, then the glazing. This is like building a model with individual LEGO bricks. It’s flexible and great for smaller, more detailed projects.
    • Unitized: Large, completed panels, often one or two stories tall with the glass already installed, are built in a factory. These massive units are then lifted by a crane and simply locked into place. This is like snapping a pre-built LEGO wall section onto your model.

    For tall towers, the unitized method is a game-changer. By manufacturing the panels in a controlled factory setting, quality is higher and work can proceed regardless of weather. Most importantly, it allows construction crews to enclose a building far more rapidly, explaining how those gleaming towers can rise and get skinned so quickly.

    A High-Tech Shield: How Curtain Walls Protect Buildings from Weather

    Beyond rapid installation, a curtain wall’s most critical job is to serve as a building’s primary shield against the elements. This glass-and-metal skin faces everything from hurricane-force winds to torrential downpours and extreme temperature swings. Unlike a simple brick wall that relies on brute force, a curtain wall is an engineered system that cleverly manages these forces rather than just blocking them. It’s less like a fortress wall and more like high-performance outdoor gear.

    When it comes to water, modern curtain walls operate on the principle of a quality raincoat: it’s not just about stopping water, but managing it. While the outer seals form a strong first line of defense, the system is designed with the expectation that a little water might get past. Tiny, hidden channels within the aluminum frame act as an internal drainage system, collecting any rogue moisture and safely guiding it back outside. This provides a far more reliable solution than trying to create a single, perfect, impenetrable seal.

    Just as important, a curtain wall is designed to move. Tall buildings aren’t rigid; they sway slightly in the wind, and their materials expand and contract with heat and cold. If the glass skin were completely stiff, these movements would create immense stress, causing panels to crack and seals to fail. Instead, the aluminum frame is engineered with joints that allow it to flex and slide just enough to absorb these forces safely. This hidden dynamism is what keeps the building’s envelope secure and watertight through every season.

    Seeing Your City Like an Architect

    A glass skyscraper is no longer a fragile, impossible structure. It is a strong internal skeleton holding up the floors, wrapped in a separate, high-tech skin—a principle that is central to any modern guide to building envelope design.

    This division of labor allows architects to create buildings that feel boundless, flooding interiors with natural light and offering panoramic views. The system, often prefabricated by a specialized curtain wall company, gives buildings their sleek aesthetic while protecting them from the elements.

    On your next walk downtown, put this perspective into action. Find a glass-faced building and look closely. Can you spot the grid of metal mullions holding the glass? Notice how it appears to hang on the building’s frame rather than hold it up. Try to distinguish the vision glass you see through from the opaque spandrel glass hiding the floors. The urban environment is a gallery, and you now have the insight to appreciate its most impressive works.

  • Steps to Successful Commercial Glass Projects

    Steps to Successful Commercial Glass Projects

    Imagine a storefront that practically pulls customers in off the street, with glass so clear it feels like there’s nothing between your products and the shopper. Your storefront is your most important employee; it works 24/7 to showcase your brand and make a first impression. It’s not just a pane of glass—it’s a powerful marketing tool that is either making you money or costing you money. There is no in-between.

    Beyond simply looking good, the right retail storefront glass directly impacts your bottom line. An inviting, modern entrance can increase foot traffic, while high-performance glass keeps your store comfortable year-round, leading to lower energy bills. Furthermore, choosing the right glass provides invaluable peace of mind, protecting your merchandise and your business from potential security threats. It’s one of the smartest investments you can make in your shop’s success.

    Fortunately, making an informed choice is simple by focusing on three key areas: appearance, security, and efficiency. This guide clarifies the process of choosing the right glass and walks you through the steps to a successful commercial glass installation, ensuring your storefront works as hard as you do.

    What Are My Main Glass Options? A Simple Guide to Tempered, Laminated, and Insulated Glass

    Choosing the right glass for your storefront is about more than just looks; it’s a critical decision for safety, security, and your bottom line. Unlike the basic glass in a picture frame, modern commercial options are engineered for performance. A smart investment starts with understanding the three main types.

    For doors and other high-traffic areas, tempered glass is the go-to for safety. It’s heat-treated to be about four times stronger than standard glass, but its real value is in how it breaks. If struck with enough force, it shatters into small, dull-edged pebbles instead of dangerous shards, just like a car’s side window. This feature drastically reduces the risk of injury, which is why it’s often required by building codes for entryways.

    When security is the top priority, laminated glass is your best defense. Think of it as a glass sandwich: a tough, clear plastic layer is bonded between two sheets of glass—the same technology used in car windshields. If struck, the glass cracks but holds together in the frame. This prevents quick entry, protecting your store from smash-and-grab attempts and acting as a powerful deterrent.

    Finally, your glass choice directly impacts your energy bills. Insulated glass, often called double-pane glass, works like a high-quality thermos. Two panes are separated by a sealed air gap that acts as a buffer against outside temperatures. This simple design keeps your store warmer in winter and cooler in summer, leading to a more comfortable space for shoppers and lower energy costs year-round. While this structure is key for insulation, specialized coatings can boost that efficiency even further.

    How to Boost Sales and Protect Products with Glass Coatings

    Beyond the core structure of your glass, specialized coatings act as powerful upgrades that can directly impact your bottom line. The most common is a Low-E (Low-Emissivity) coating, an invisible metallic layer that dramatically improves insulation. Think of it as transparent sunscreen for your storefront. It blocks heat from the sun in the summer and keeps your store’s warmth from escaping in the winter, creating some of the most energy efficient commercial windows available. Just as importantly, it filters out damaging UV rays that cause your valuable merchandise to fade over time.

    Just as important as saving money is making it. For this, anti-reflective glass offers a stunning advantage. It’s engineered to minimize glare and reflection, making the glass pane seem to disappear. The benefits of anti-reflective display glass are most obvious for businesses with intricate displays, as it provides a crystal-clear, uninterrupted view of your products. This makes it the best glass for jewelry display cases, high-end boutiques, and art galleries where every detail matters to the customer.

    These coatings can be added to most glass types, including tempered and laminated options, working together to create a high-performance solution.

    Consider a coating if:

    • Your store gets a lot of direct sun.
    • You sell high-end display items (like jewelry or apparel).
    • Your energy bills feel too high.

    While coatings enhance performance, the physical strength of your storefront still depends on its core construction.

    Is Your Storefront Secure? A Realistic Look at Shatterproof and Security Glass

    Protecting your business after you’ve locked up for the night is a primary concern for any retailer. While tempered glass shatters safely, it offers little resistance to a determined intruder. This is where security glass comes in. When you hear the term “shatterproof,” it typically refers to glass that won’t allow immediate entry when broken. For most retail applications, the industry standard for this is laminated glass. Its inner vinyl layer acts like a web, holding the broken panes in place and preventing the quick smash-and-grab entry that is a constant threat.

    A common question is how this compares to security film. A security film is a tough, transparent sheet applied to your existing glass. It’s an effective upgrade that holds shattered glass together, making it much harder for someone to break through and significantly delaying entry. However, for a new installation, laminated glass provides more integrated strength. Since its protective layer is bonded inside the glass structure itself, it offers a higher level of foundational security than a surface film can.

    In situations demanding the highest level of protection, there are even stronger shatterproof glass options for business, like polycarbonate. This isn’t glass at all, but a plastic glazing material that is virtually unbreakable—often used for high-value merchandise like jewelry. Deciding on the right level of protection by balancing cost and risk is a crucial first step in any retail storefront glass replacement project.

    The Storefront Installation Process Step-by-Step: What to Expect

    Once you’ve chosen the right type of glass for your shop, the installation process is more straightforward than you might imagine, especially when handled by qualified commercial glaziers. It’s a well-defined project designed to be as efficient as possible, ensuring your business is secure and looking its best with minimal downtime.

    A typical project has four clear stages, with the majority of the work happening off-site before the team arrives.

    1. Consultation & Measurement: A specialist visits your store to discuss your needs, confirm glass choices, and take precise measurements of the frames.
    2. Glass Fabrication & Delivery: Your glass isn’t sitting on a shelf. It’s custom-built to your exact specifications. This fabrication stage is the longest part of the process.
    3. Site Preparation & Removal: On installation day, the team prepares the area and carefully removes your old glass and frames.
    4. New Glass & Frame Installation: The new, custom-made glass panels and framing system are professionally installed, sealed, and cleaned.

    Professional installers understand that you can’t afford to close your doors for long. That’s why the entire process is planned to minimize business disruption. Whenever possible, installation is scheduled during off-peak hours or even overnight. The team works efficiently to make sure your storefront is secured, weathertight, and ready for business by the time you open.

    Decoding Your Quote: What Really Determines the Cost of New Shop Windows?

    When you receive an estimate for a retail storefront glass replacement, the final price reflects more than just the size of the window. The total cost is a combination of specific materials and the complexity of the job. A transparent quote from a professional glazier will typically break down these five key drivers:

    • Glass Type: High-security laminated glass costs more than standard tempered glass.
    • Glass Size & Thickness: Larger and thicker panes require more material and specialized handling.
    • Special Coatings: Upgrades like energy-efficient Low-E coatings add to the material cost.
    • The Frame System: Repairing an existing frame is less expensive than installing a completely new one.
    • Labor & Accessibility: A difficult-to-reach second-story window will require more labor than a simple ground-floor panel.

    Many owners are surprised to learn that the metal structure holding the glass—the storefront framing system—can be a significant budget item. If your existing aluminum frame is bent, corroded, or you’re changing the configuration of your entrance, a full frame replacement may be required. This process is more involved than a simple glass swap and can sometimes be a larger portion of the investment than the glass itself.

    Beyond the total on the estimate, look for a quote that itemizes these components. A professional proposal should clearly separate the cost of the glass, the framing system, and labor. This transparency is the sign of a trustworthy partner, as it allows you to compare proposals accurately and ensures there are no hidden fees.

    Emergency Glass Break? Your First 3 Steps

    A shattered storefront from an accident or vandalism is a stressful and dangerous situation. Your absolute first priority is safety. Immediately block off the area to keep staff and customers away from the hazard. Resist the urge to handle large, sharp shards yourself—it’s a task best left to professionals equipped with the right safety gear.

    Your next call should be to a company offering 24/7 emergency storefront board-up services. A technician will arrive quickly to safely clear the dangerous debris and secure the opening with sturdy plywood. This crucial step protects your shop from the weather and prevents unauthorized entry while your custom replacement glass is measured and fabricated. Professional glass repair services are designed to make your property safe first and foremost.

    With the immediate crisis managed, the path forward is clear. Follow these three steps to get your business back to normal:

    1. Secure the Site: Keep everyone at a safe distance.
    2. Call for Emergency Service: Get a professional glazier on the way to board up the opening.
    3. Contact Your Insurance: Start the claims process once the property is secure.

    The glazier will then manage the measurements and ordering for the permanent commercial glass installation, turning an urgent problem into a planned project.

    Your Checklist for a Flawless Commercial Glass Project

    You now see your storefront glass not as a simple pane, but as a strategic business tool for enhancing security, lowering energy bills, and drawing customers in. You are equipped to make a smart investment in your shop’s future, from a basic glass door installation to a full storefront renovation.

    To turn this knowledge into action, you need to find a professional who understands your vision. Taking control of the conversation starts with asking the right questions. When vetting a potential partner, use this checklist to ensure you have a complete picture of their proposal and qualifications:

    • What glass type do you recommend for my top priority (e.g., security, energy savings)?
    • Is your quote all-inclusive, covering removal, installation, and disposal?
    • What is the warranty on both the glass and the installation workmanship?
    • How long will the installation take, and how will you minimize disruption to my business?
    • Can you provide current proof of your insurance and licensing?

    Always get at least two quotes, but remember that the lowest price isn’t always the best value. The right partner is the one whose answers to these questions give you confidence. They will be focused on choosing the right glass for a shop front that meets your specific business needs, not just selling you the most expensive option. You are now ready to choose a solution that makes your storefront work as hard as you do.

  • Houston’s Best Kitchen and Bath Inspirations

    Houston’s Best Kitchen and Bath Inspirations

    Tired of looking at those same builder-grade oak cabinets and laminate countertops from 1995? You’re not alone. Many Houston-area homes have great bones but are ready for a modern refresh. If you’re dreaming of a kitchen that’s finally ready for holiday hosting or a bathroom that feels like a spa retreat after a long day in the Texas heat, you’re in exactly the right place for some real-world kitchen and bath ideas in Houston, Texas.

    This guide skips the confusing jargon to focus on what truly matters: exploring popular design styles that feel right in our city, selecting materials that can actually stand up to our humid climate, and setting a realistic budget for your project. After all, industry data from sources like Remodeling Magazine consistently shows that smart kitchen and bath updates provide one of the best returns on investment for homeowners.

    Transforming your space from dated to dream-worthy is more achievable than you might think. A beautiful and functional remodel doesn’t have to be an overwhelming mystery saved for TV shows. This journey begins with clear inspiration and practical advice, empowering you to move from simply wishing for a change to confidently planning your next Texas home improvement.

    What Are the Hottest Kitchen Styles in Houston Right Now?

    If you’ve walked through a recently updated home in Houston, you’ve likely noticed that walls are disappearing. Gone are the days of the small, closed-off kitchen. Today, it’s all about creating a bright, connected space where life happens. This popular layout, often called an open-concept kitchen and living room, turns the heart of your home into a single, inviting area for cooking, entertaining, and relaxing with family.

    At the center of this trend is the multitasking kitchen island. It’s no longer just a spot for chopping vegetables; it’s the new family command center. Picture an island with plenty of room for meal prep, a built-in sink, and comfortable seating where kids can do homework or guests can chat with you while you cook. This transforms the kitchen from a work zone into a social hub, making it one of the most requested features in Houston kitchen remodels. The style that ties this all together is a flexible look designers call “Transitional.” It’s the perfect blend of classic comfort and modern simplicity, feeling both timeless and fresh.

    So, what are the key ingredients for today’s perfect Houston kitchen? It boils down to a simple, winning formula:

    • A large, functional island for prep, storage, and seating.
    • An open connection to the main living area.
    • A “Transitional” mix of classic elements (like Shaker-style cabinets) and modern finishes (like sleek quartz countertops and simple hardware).

    Creating Your Spa-Like Bathroom Retreat to Escape the Texas Heat

    After a long, humid Houston day, your master bathroom should be more than just a functional room—it should be an escape. Achieving that true spa-like feel starts with smart material choices that stand up to our climate. Forget small, busy tiles with endless grout lines that are tough to keep clean. Instead, designers are using large-format porcelain tiles on floors and even up the shower walls. These bigger tiles create a calm, seamless look, feel cool underfoot, and their minimal grout lines are a practical defense against humidity and mildew, making them perfect for a Houston home.

    Beyond the tiles, one of the most impactful upgrades is replacing a bulky, built-in bathtub deck. Many Houston homes from the 80s and 90s feature these massive platforms that consume valuable floor space. The modern solution is a sleek freestanding tub. Acting more like a beautiful piece of furniture than a fixture, it instantly makes the room feel larger, more luxurious, and more open. This single change can completely transform the character of your master bathroom, moving it from dated and clunky to elegant and relaxing.

    To take that open, airy feeling even further, many homeowners are embracing a high-end concept known as a ‘wet room’. Instead of a separate, enclosed shower, a wet room design places the shower and often the freestanding tub together in one larger, waterproofed area, usually behind a simple glass panel. This popular design for luxury bathroom remodels in Houston not only makes a smaller bathroom feel significantly more spacious but also creates a seamless, ultra-modern look that is surprisingly easy to clean. It’s the ultimate way to craft a personal retreat that feels both expansive and serene.

    Quartz vs. Granite: Which Countertop Is Right for Your Houston Home?

    Just as the right tile sets the tone for a bathroom, the countertop is the functional and visual centerpiece of your kitchen. It’s where you’ll prepare meals, help with homework, and gather with family. When considering kitchen and bath ideas in Houston, Texas, the debate between quartz and granite countertops is one of the most common—and important—decisions you’ll make.

    For homeowners who love a truly one-of-a-kind look, Granite is a fantastic choice. Because it’s a 100% natural stone mined from the earth, every single slab has unique swirls, flecks, and colors. However, its natural origin also means it is porous. Think of it like a very dense sponge; spills like red wine or oil can soak in and stain if the surface isn’t sealed periodically, usually about once a year.

    On the other side of the discussion is Quartz. This is an engineered product, made from crushed natural quartz mixed with resins and pigments. This process creates an incredibly hard, non-porous surface. For a busy family, that’s a huge plus—a coffee spill that sits for a while won’t cause a panic. While the patterns are more uniform than granite’s, quartz offers a clean, consistent look with zero required maintenance. No sealing, ever.

    Ultimately, the best choice depends entirely on what you value most. Do you prefer the unique, organic beauty of granite and don’t mind a little annual upkeep? Or do you prioritize the bulletproof durability and worry-free maintenance of quartz? As a top choice in many Houston kitchen remodels, both materials offer a stunning upgrade. The right one is simply the one that best fits your home and your lifestyle.

    How to Fight the Houston Humidity in Your Bathroom Remodel

    In a city like Houston, the battle against moisture in your bathroom is a year-round affair. When planning your project, thinking about humidity isn’t just a good idea—it’s the key to a remodel that lasts. Protecting your investment from moisture damage involves a few key choices that work together to keep your new space fresh and clean.

    Beyond just looking good, your material selections are your first line of defense. When you’re considering bath renovation ideas, start with these three humidity-fighting must-haves:

    1. A Properly Sized Exhaust Fan: A weak, noisy fan won’t cut it. Your contractor should install a fan with enough power, measured in CFM (Cubic Feet per Minute), to completely clear the room of steam within minutes. This single feature is the most important tool for preventing mold and mildew growth.
    2. The Right Paint Finish: Matte and flat paints look lovely, but they can act like a sponge for moisture. For bathroom walls, always choose a satin or semi-gloss finish. This creates a harder, more durable surface that repels water droplets, making it difficult for mildew to take hold and easy to wipe clean.
    3. Waterproof Flooring: Wood and some types of laminate can swell or warp in a constantly damp environment. Stick with proven, humidity-resistant bathroom materials like classic porcelain tile or Luxury Vinyl Plank (LVP). LVP gives you the warm, beautiful look of hardwood but is 100% waterproof, making it a perfect, worry-free choice for the Houston climate.

    Making these smart, strategic choices at the beginning of your project ensures your beautiful new bathroom will stand the test of time. These decisions also influence the overall budget, which brings up the question every homeowner has: how much should you plan to invest in your remodel?

    How Much Does a Kitchen Remodel Actually Cost in Houston?

    Figuring out how much a kitchen remodel costs in Houston can feel overwhelming, but the answer truly depends on your goals. To make sense of the numbers, professionals often think in terms of three budget levels: the cosmetic Refresh, the popular Mid-Range remodel, and the all-in Full renovation. Each tier delivers a different level of change and a different kind of value to your home.

    The scope of your project is the biggest factor in its final price tag. A budget-friendly Refresh might focus on high-impact, low-cost changes like painting existing cabinets and updating hardware. This is a fantastic option for small kitchen renovation ideas in Houston, TX. A Mid-Range remodel goes further, typically involving new countertops, a backsplash, and new appliances without changing the kitchen’s layout. Finally, a Full renovation means taking the room down to the studs to create a brand-new space, often moving walls and plumbing.

    In our area, a simple Refresh can often be achieved for under $10,000. For a Mid-Range project—the most common path for updating an outdated kitchen in a Texas home—homeowners should realistically plan for a budget between $25,000 and $60,000. A Full renovation that reconfigures the entire layout will almost always start at $75,000 and go up from there.

    While those numbers are significant, a smart kitchen remodel is one of the best investments you can make. It’s not just an expense; it’s an improvement that adds significant daily enjoyment and boosts your home’s resale value. In fact, industry reports show that minor kitchen remodels in our region often recoup over 50% of their cost at sale.

    Your 5-Step Roadmap to a Stress-Free Renovation

    A successful remodel moves through five distinct phases: dreaming and planning, hiring your professional team, finalizing all the design details, the actual construction, and finally, adding the finishing touches. This structure applies whether you’re embarking on a full kitchen overhaul or figuring out how to plan a bathroom renovation in Houston.

    For any project involving multiple trades like plumbing and electrical, you’ll need a leader to coordinate everything. This is the crucial role of a General Contractor (GC). Think of your GC as the conductor of an orchestra; they ensure the tile installers, electricians, and painters all perform their part at the right time and in the right order. They handle permits, manage the schedule, and are your single point of contact, which is why checking Houston kitchen and bath contractors reviews is so vital.

    Crucially, most of a project’s success is determined before a single wall is touched. The first three phases—planning, hiring, and design finalization—are where you lock in decisions and prevent costly mid-construction changes. Diligent upfront planning is the absolute key to a smooth, on-budget Texas home improvement project that you’ll love for years.

    Your First Step to a New Kitchen or Bath

    From open-concept kitchens to spa-like bathrooms, a successful Houston remodel hinges on smart choices. It means selecting a Transitional style that feels both timeless and fresh, choosing between the natural beauty of granite and the durable practicality of quartz, and fighting humidity with the right fans, paint, and waterproof flooring.

    Your journey from dated to dream-worthy begins not with a contract, but with inspiration. Your first step is to make the vision tangible. Take a low-pressure trip to a local kitchen and bath showroom—not to buy, but simply to explore. Run your hand over a quartz countertop, feel the weight of a cabinet pull, and see the tile in person. This simple outing bridges the gap between idea and reality, empowering you to take the next step with confidence when you’re ready.

  • The Role of Allison Transmissions in Construction

    The Role of Allison Transmissions in Construction

    Everyone assumes a bigger engine is what makes a 40-ton truck powerful. They’re wrong. If you’ve ever struggled to get your car moving on an icy hill, you’ve felt the real challenge. Now, imagine your car weighs as much as ten elephants and the ‘hill’ is a sea of mud. The secret to conquering that problem isn’t just raw power; it’s a piece of specialized technology working silently behind the engine.

    The biggest battle for heavy equipment is simply getting started. Think about trying to ride a bicycle up a steep hill while carrying a huge backpack—you need to push off perfectly just to get going. For a construction truck, that “backpack” can weigh over 80,000 pounds. Overcoming this immense inertia without stalling or spinning the wheels is the transmission’s first and most critical job.

    Once moving, the punishment continues. Your car might shift gears a few dozen times on your way to work, but a construction vehicle endures a much harsher daily routine. It’s a brutal cycle of constant starting, stopping, and crawling under full load, often hundreds of times per day. In practice, this relentless stress is why the durability of automatic transmissions in this environment is paramount.

    A scaled-up car transmission would simply tear itself apart under these conditions. It isn’t designed for the force required to get a massive load moving or the fatigue of doing it all day long. This is where purpose-built engineering becomes non-negotiable. The proven Allison transmission benefits stem from a design that anticipates this exact punishment, delivering the controlled power and reliability needed to survive on the world’s toughest job sites.

    The Secret to a Stall-Proof Start: How a Fluid ‘Clutch’ Works

    Getting a massive truck moving from a dead stop, especially on a muddy or uneven job site, requires incredible force. If you simply connected the powerful engine directly to the wheels, it would likely lurch forward and stall, just like a car when you pop the clutch too fast. Allison automatics solve this problem with a brilliant piece of engineering called a torque converter.

    The secret is that there’s no rigid mechanical clutch. Instead, a torque converter acts as a fluid coupling. Imagine two fans facing each other inside a sealed, oil-filled case. One fan is connected to the engine, and the other is connected to the wheels. When the engine spins its fan, the moving fluid makes the other fan spin. Because there’s no solid link, the engine can keep running even if the wheels are completely stopped.

    Beyond just preventing stalls, the torque converter provides a hidden “power boost.” When the driver hits the accelerator from a standstill, the fluid dynamics inside the converter actually multiply the engine’s turning force. This gives the truck a smooth but mighty surge of power right when it’s needed most, helping to overcome the immense weight and get rolling without drama.

    This initial surge of power is a cornerstone of Allison performance and is key to solving traction issues on uneven job sites. By delivering amplified force smoothly to the wheels, the torque converter dramatically improves off-road performance and allows a fully loaded truck to start moving up a steep grade with confidence. But getting started is only half the battle; keeping that momentum is just as critical.

    Why Allison Transmissions Never Lose Momentum on a Climb

    Getting a heavy truck moving is one thing, but keeping it moving up a slippery grade is another challenge entirely. Think about shifting gears on a bicycle while climbing a steep hill—for a split second, as the chain moves, you lose power. This is called power interruption. In a massive truck carrying tons of material, that brief pause can be enough to lose crucial momentum, causing the vehicle to slow, slip, or even roll backward.

    This is where the difference between an Allison vs a manual transmission in a construction vehicle becomes crystal clear. Allison’s patented Continuous Power Technology™ is engineered to eliminate that dangerous power interruption. Instead of disconnecting power to shift, it smoothly transfers it from one gear to the next. It’s like having a magical bicycle that can change gears instantly without you ever stopping your pedal stroke.

    The result is a truck that feels like it has one long, seamless gear, allowing it to accelerate steadily up even the muddiest and steepest grades without losing traction. This is one of the key Allison 4000 Series features that operators rely on. On a treacherous construction site, this isn’t just about performance; it’s a critical safety feature that gives the driver superior control when it matters most.

    This ability to deliver uninterrupted power to the wheels is foundational, but it also opens the door to another incredible capability. What happens when a vehicle needs to power more than just its wheels? A cement mixer, for example, has to drive and spin its heavy drum at the same time, which requires a special kind of power.

    How One Transmission Powers a Whole Concrete Mixer

    A concrete mixer is the perfect example of a vehicle with two demanding jobs. It must navigate city traffic and construction sites just like any other truck, but it also has to continuously spin a heavy drum full of concrete. So how does a single engine provide power for both the wheels and that massive, rotating mixer?

    The solution is a clever piece of engineering called a Power Take-Off, or PTO. Think of a PTO as a special accessory port on the transmission that can redirect some of the engine’s power to run onboard equipment. Instead of needing a separate, clumsy engine just for the mixer drum, the entire truck runs off one integrated and reliable system. The availability of different Allison transmission Power Take-Off (PTO) options ensures the right amount of power is available for the specific job.

    When a concrete truck is driving, the Allison transmission sends power to the wheels. But when it’s time to mix or pour, the PTO engages to send power to the hydraulic system that turns the drum. This dual-power capability is a hallmark of the brand’s vocational models, and it’s a key reason you’ll often find an Allison in this application. Answering the question of which Allison series is for concrete mixers, this is a primary function of the rugged 4000 Series, a cornerstone of any Allison transmission vocational model guide.

    Ultimately, this integration means fewer points of failure and more efficient operation. Having the muscle to climb hills and the auxiliary power to run equipment is one part of the equation. But coordinating all these tasks requires intelligence, which brings us to the electronic brain behind the brawn.

    The ‘Brain’ in the Gearbox: How Smart Software Saves Fuel

    That intelligence isn’t just a figure of speech. While older transmissions were purely mechanical, modern Allison automatics are controlled by a sophisticated onboard computer. This electronic “brain” is what allows a driver to use a simple push-button selector instead of wrestling with a complex stick shift. It constantly analyzes information like engine speed, vehicle weight, and how steep the road is to make perfect decisions every single moment.

    Think of this system as an expert driver who instantly adapts to any situation. It knows not to shift gears in the middle of a steep, slippery climb, and it understands when to let the engine relax on a flat, open road. This adaptive ability goes far beyond a simple pre-programmed shifting pattern; it’s a dynamic response to the real-world demands placed on the truck.

    This is exactly how does Allison FuelSense® 2.0 work at its core. It’s a software package designed to actively hunt for opportunities to save fuel. By analyzing the driving situation, it makes hundreds of micro-adjustments—like shifting at the most efficient engine speed or coasting when appropriate—that add up to significant savings. For companies focused on improving construction fleet fuel efficiency, these smart Allison transmission features are a game-changer.

    Ultimately, this smart technology does more than just save money on fuel. By ensuring the transmission is always in the right gear at the right time, it reduces strain on the entire truck and provides a smoother, less fatiguing experience for the operator. This direct link between intelligent control and equipment durability is crucial, which leads us to why a smoother ride for the driver often means a longer life for the truck.

    Why a Smoother Ride for the Driver Means a Longer Life for the Truck

    That smooth, controlled operation isn’t just about driver comfort; it’s a critical layer of protection for the entire vehicle. Anyone who has driven a manual car knows the jarring “thump” of a poorly timed shift. Now, magnify that force by the weight of a 40-ton dump truck. These powerful jolts, known as driveline shock, send a damaging shockwave through every component, from the engine to the axles. This is a common point of comparison when looking at an Allison vs a manual transmission in demanding environments.

    An Allison fully automatic, by its very nature, acts as a buffer against this abuse. Because the torque converter uses fluid—not a hard mechanical clutch—to transfer power, it naturally dampens these harsh forces. The transmission’s smart software also ensures there are no missed shifts or clumsy engagements. This seamless operation is a key factor in the superior durability of automatic transmissions in heavy equipment, as it prevents the most common cause of premature wear and tear.

    This protection extends far beyond the transmission itself. By eliminating driveline shock, an Allison automatic reduces stress on the U-joints, axles, and even the engine mounts. Fewer violent jolts mean fewer surprise breakdowns and less time spent in the shop for repairs, which directly impacts the maintenance schedule for vocational transmissions. A truck that runs smoothly is a truck that stays on the job site, working and earning.

    Ultimately, by taking the burden of perfect shifting off the operator, the transmission allows them to focus completely on the task at hand—navigating a crowded work area or precisely positioning their truck. This constant, silent protection does more than just move the truck forward; it acts as an invisible guardian for the equipment and the operator. It’s like having an unseen engineer on every job site.

    The Unseen Engineer on Every Job Site

    That massive dump truck on the muddy hill is no longer a mystery of just raw power. You now understand the hidden intelligence at work: how a fluid coupling gets it moving without a jolt, how uninterrupted power lets it climb without faltering, and how a separate power source can lift tons of rock. You’ve seen behind the curtain of heavy-duty equipment and can now spot the difference between muscle and mastery.

    Your next step is simple: observe. The next time you’re near a construction site or beside a rumbling cement mixer, look closer. Notice the incredible grace with which these giants operate in tight spaces and tough terrain. That smoothness isn’t an accident; it’s a direct result of the advanced industrial transmissions you now understand, a key component in all types of construction machinery.

    You’ll never see these vehicles the same way again. Instead of just big engines and big tires, you now recognize the sophisticated engineering heart—the Allison transmissions—translating brute force into controlled, reliable work. You’re now in on the secret of how the modern world gets built, one perfectly delivered shift at a time.

  • Design Trends in Whole House Remodeling

    Design Trends in Whole House Remodeling

    Do you love your older home’s history, but not its floor plan? You’re not alone. Many homeowners cherish the unique character of their house but feel constrained by a maze of small, dark rooms that just don’t fit a modern lifestyle. The great secret of whole house remodeling is that you don’t have to choose between charm and function. It’s entirely possible to preserve the soul of your home while creating the bright, open, and welcoming space you’ve always wanted.

    A successful home renovation doesn’t begin with a sledgehammer; it starts with a clear vision. The most stunning transformations—from a light-filled kitchen in a Craftsman bungalow to a seamless indoor-outdoor living area in a mid-century ranch—are born from a thoughtful plan that respects the home’s past. This approach is key to creating a design that feels cohesive and authentic, not just a collection of trendy ideas that will soon feel dated.

    This guide offers a roadmap for blending new efficiencies with timeless character, establishing a realistic budget, and turning your vision into a home that perfectly fits the way your family lives today.

    The Preservation Playbook: How to Keep Character When Renovating an Old House

    Renovating an old house often comes with a nagging fear: will we lose the charm we fell in love with? The key to a successful project is learning how to preserve character by first identifying its irreplaceable soul. Before you plan anything else, walk through your home and photograph its “character-defining features”—the unique parts you couldn’t easily replicate. This could be the intricate fireplace mantel, the sturdy newel post on the staircase, or the wavy glass in an original pantry door. This photo album becomes your “must-save” list, guiding every decision that follows.

    Surprisingly, the secret to making these historic details shine isn’t surrounding them with more old things. Instead, successful historic home modernization ideas often rely on contrast. Think of it like putting a beautiful old painting in a simple, modern frame—the clean lines of the frame make the artwork pop. In your home, this could mean setting off original dark wood trim with crisp, white walls or hanging a sleek, modern light fixture that beautifully illuminates an ornate ceiling medallion. The new highlights the old.

    So, how do you decide what stays and what goes? It’s a balance between preserving beauty and ensuring modern safety and comfort.

    • Keep & Restore:
      • Original hardwood floors
      • Unique trim, molding, and millwork
      • Stained glass or leaded windows
    • Update & Replace:
      • Old, inefficient single-pane windows
      • Outdated and unsafe electrical systems
      • Irreparably damaged plaster walls

    This balance allows you to respect the home’s past while preparing it for the future. But what happens when preserving character seems to conflict with the desire for a more spacious layout?

    Opening Up History: What “Open Concept” Really Means for a Traditional House

    The dream of an open-concept floor plan in a traditional house is powerful—more light, better flow, and space to connect with family. But before you grab a sledgehammer, it’s vital to understand that not all walls are created equal. Some are simple dividers, while others, known as load-bearing walls, are part of your home’s skeleton, holding up the weight of the floor above or even the roof. Removing one without professional guidance is like pulling a block from a Jenga tower. A simple clue? If there’s a wall or major beam directly above the one you want to remove, it’s likely structural. This is where consulting a structural engineer is not just a good idea—it’s essential for safety and the integrity of your home.

    This doesn’t mean your dream of a more open space is over. Instead of completely erasing walls, consider a “broken-plan” layout. This smart design strategy creates the feeling of openness while keeping the distinct zones that make older homes feel cozy. Imagine replacing a solid wall with a wide, cased opening that frames the view into the next room, or using a large kitchen island as a subtle divider. Even a necessary structural post can be wrapped in beautiful wood, becoming a handsome feature that defines the space, as seen in many inspiring old house gut renovation before and after photos.

    Ultimately, achieving a brighter, more connected home is about smart adjustments, not just demolition. By working with your home’s structure, you can blend classic character with modern living. Opening up walls also provides a unique opportunity to address the outdated and inefficient “engine” of plumbing and electrical systems hidden behind them.

    Upgrading Your Home’s Engine: The Critical Importance of Electrical and Plumbing

    That “engine” we mentioned—your home’s mechanical systems—is where a remodel shifts from cosmetic to critical. Many older homes contain outdated and unsafe components, like knob-and-tube wiring, a common electrical system from the early 20th century. It was never designed for the demands of modern life and can pose a significant fire risk. Likewise, old galvanized steel pipes are often corroded and clogged, leading to low water pressure and potential leaks. For this reason, updating old house electrical and plumbing isn’t just an option during a major renovation; it’s a fundamental safety requirement.

    Beyond safety, your vision for a modern home relies entirely on these new systems. A gourmet kitchen with a powerful induction cooktop, double oven, and wine fridge simply cannot run on an electrical panel from the 1950s. That spa-like master bathroom with multiple shower heads needs updated plumbing that can deliver strong, consistent water pressure without straining the rest of the house. This behind-the-scenes work is the essential foundation that makes all the beautiful, visible finishes you’re dreaming of possible.

    While you won’t see these new pipes and wires every day, you will absolutely feel their impact. These are some of the most effective energy efficient upgrades for vintage properties, often leading to noticeably lower utility bills and a more comfortable home. More importantly, this investment provides priceless peace of mind—no more flickering lights, tripped breakers, or worrying about a hidden leak. Addressing these challenges of remodeling older properties brings up a crucial question: Where do you even start?

    Where Do I Even Start? Your True First Step in a Full Home Renovation

    Faced with a massive project, the first impulse for many homeowners is to start calling contractors. But the true first step in a full home renovation is much closer to home: getting crystal clear on your goals. Before anyone can give you a realistic quote, you need to define what success looks like for your family. Are you solving a daily frustration, like a cramped kitchen? Or are you chasing a dream, like a bright, open space for entertaining? Answering this question is the foundation of your entire project.

    This is where the most important conversation of your remodel happens: separating your absolute “needs” from your “nice-to-have” wants. Your needs are the non-negotiables that solve a fundamental problem, while your wants are the upgrades that would be great if the budget allows. Drawing this line early is the most powerful tool you have to how to budget for a whole home remodel, giving you a clear compass for making tough decisions down the road.

    Grab a piece of paper and make two columns with your family. Being brutally honest here will save you headaches and money later.

    Needs (Must-Haves) | Wants (Nice-to-Haves) | | :— | :— | | Fix the leaking roof | Heated floors in the bathroom | | Add a second bathroom for the kids | A professional-style gas range | | Create a functional kitchen layout | A statement chandelier in the entry |

    Once you have this foundational list, you’re no longer just dreaming; you have a starting plan. Now, it’s time to find the right experts to help bring this vision to life.

    Assembling Your Dream Team: Architect, Designer, or General Contractor?

    With your foundational “needs and wants” list in hand, you’re ready to translate that vision into a buildable plan. This is where professionals come in, and knowing who does what is critical. If your project involves changing the structure of your house—like removing walls, adding a story, or changing the home’s footprint—you’ll likely start with an Architect. They are the licensed experts who create the formal blueprints, ensuring your ambitious ideas are safe and possible. They are essential when you’re facing a big renovate vs tear down old house decision, as they can assess the building’s core integrity and often work with specialists in structural engineering for old homes.

    While an architect handles the “bones” of the house, an Interior Designer focuses on its flow, feel, and function. This role goes far beyond picking paint colors; a designer helps with space planning to ensure rooms are laid out logically, selects all the finishes from flooring to light fixtures, and ensures the final result is cohesive and beautiful. If your main goal is a stunning new kitchen or a bathroom that feels like a spa, a designer’s expertise in materials and layout is invaluable.

    Once the plans are set, the project moves from paper to reality under the guidance of a General Contractor (GC). Think of the GC as the on-site director of your renovation. They don’t typically swing the hammer themselves; instead, they hire, schedule, and manage all the specialized tradespeople—like plumbers, electricians, and painters—who are known as subcontractors. The GC is your primary point of contact during construction, responsible for keeping the project on schedule and on budget.

    Understanding these distinct roles is key to a smooth process. Some firms, known as design-build companies, offer all these services under one roof, which can simplify the process. Regardless of your path, assembling the right team transforms your list of dreams into a tangible, professionally executed reality. Of course, hiring experts brings us to the most pressing question of all: how do you pay for everything?

    The Unseen Price Tag: How to Budget for a Whole Home Remodel

    Talking about money can be the least exciting part of a remodel, but a realistic budget is the foundation of a successful project. So, how do you even begin to guess the cost? As a starting point, many builders use a rough cost per square foot estimate. This number varies wildly based on your location and desired finishes—from $150 for basic updates to over $300 for high-end work—but getting a local range provides an essential reality check before you fall in love with a plan you can’t afford.

    The biggest financial challenge of remodeling older properties, however, isn’t in the planned work; it’s in the surprises. This is why every budget needs a contingency fund—your project’s “just in case” money. This is a separate pool of cash, typically 10-20% of your total project cost, set aside specifically for the unexpected. When you open up the walls of a century home, you might discover issues that must be fixed.

    Common hidden costs include:

    • Asbestos or lead paint abatement
    • Unexpected structural rot or termite damage
    • Foundation repairs
    • Bringing old plumbing and electrical up to current code

    Ultimately, the smartest way to budget for a whole home remodel is to plan for both the seen and the unseen. By combining your contractor’s estimate with a healthy contingency fund, you create a realistic financial picture that protects your project from stress and delays. With this crucial number in mind, you’re ready to move on to the next step.

    Your Next Steps: From Inspired Idea to Actionable Plan

    You once saw your home’s maze of small rooms as a fixed reality; now, you see it as a canvas. The overwhelming idea of a whole house remodeling project has been replaced by a clear, manageable plan. You are now prepared to take the most important step: the very first one. Instead of getting lost in the final vision, focus on what’s right in front of you.

    Your Starting Checklist:

    1. Create Your ‘Needs vs. Wants’ List. Be honest about what you can’t live without versus what would be nice to have.
    2. Define Your Budget. Calculate your total and set aside at least 15% as a contingency fund for surprises.
    3. Research & Interview One of Each: An architect, a designer, and a general contractor to understand their roles and find the right fit.

    Every successful home improvement story—whether it’s transforming a compartmentalized bungalow into an open-concept retreat or updating a historic colonial for a modern family—begins exactly where you are now. With this checklist, you are no longer just wishing for a change. You are taking the first deliberate step toward building a home that truly fits your life.

  • Houston’s Hottest Bathroom Design Ideas 2023

    Houston’s Hottest Bathroom Design Ideas 2023

    Is your morning routine a cramped shuffle in a bathroom last updated when the Oilers were still in Houston? You’re not alone. For many homeowners, the thought of updating an outdated 80s bathroom with its clunky tub-and-shower combo and poor lighting feels overwhelming. That dated space is exactly what countless others across the city are eager to leave behind for something better.

    The big shift in design, according to industry experts, isn’t just about new tile; it’s about changing how the room feels. Today, the top whole bathroom remodeling trends in Houston, Texas focus on transforming this purely functional room into a personal oasis—a calm, quiet retreat designed to be your private escape from the world and the local humidity.

    This guide explores the most popular bathroom remodel ideas, from spa-like open showers and smart technology to the specific humidity-proof materials that are essential for our climate. You’ll get a clear look at what’s possible, empowering you to create a beautiful space that adds real, lasting value to your home.

    The End of the Shower Curb? Why Houston is Embracing the Walk-In Shower

    One of the biggest shifts in modern bathroom design involves getting rid of something we’ve always taken for granted: the shower curb. A curbless or “walk-in” shower is exactly what it sounds like—a shower where the floor tile runs seamlessly from the main bathroom right into the shower stall. This creates an unbroken visual line that can make even a small guest bath feel significantly more spacious and open. It’s a clean, high-end look that instantly elevates the entire room.

    Beyond the beautiful, spa-like appearance, this trend has a powerful practical benefit. Removing the need to step up and over a barrier makes the shower accessible to everyone, from young children to those with mobility challenges. This concept, known as “aging-in-place” design, is about creating a home that remains safe and functional for you and your family for decades to come, adding long-term, practical value to your remodel.

    For those who want to take this concept even further, there’s the “wet room.” Think of this as the ultimate walk-in shower, where the entire bathroom is expertly waterproofed to handle water spray. While a full wet room is a major project, the more common curbless shower gives you that same open-concept feel in a more focused way.

    This trend, however, is not DIY-friendly. Creating a successful curbless shower requires a professional to meticulously slope the floor and install a specialized waterproofing system underneath the tile. This is critical to ensure water goes down the drain, not into your subfloor. For a feature this impactful, investing in expert installation is non-negotiable to protect your home and your investment.

    Freestanding Tub vs. Luxury Shower: Which Adds More Value to a Houston Home?

    Now that you’re considering a beautiful walk-in shower, the next big question often follows: what about the bathtub? For years, the master bathroom ideal was a large, built-in tub. Today, however, many Houston homeowners are debating whether to replace it with an even larger, more luxurious shower or a stunning freestanding tub. This decision impacts not just your daily routine but also your home’s future marketability.

    When it comes to walk-in shower vs bathtub resale value, real estate agents generally offer one piece of advice: try to have at least one bathtub somewhere in the house. If you’re remodeling your only full bathroom, removing the tub entirely might deter potential buyers, especially families with young children. But if you have another tub in a guest or kids’ bathroom, you have the freedom to design your primary suite based purely on your personal preference.

    So, how do you choose between these two spa-like bathroom features at home? It boils down to space and lifestyle.

    • The Freestanding Tub: This is an undeniable showstopper, a sculptural centerpiece that signals pure luxury.
      • Pros: Creates a high-end, resort-like feel; perfect for long, relaxing soaks.
      • Cons: Requires significant floor space and can be more difficult to clean around.
    • The Oversized Luxury Shower: This option prioritizes daily function and modern aesthetics.
      • Pros: Excellent for everyday use; makes a bathroom feel more open; can be equipped with multiple showerheads and benches.
      • Cons: Misses the “soaking tub” appeal that some buyers specifically look for.

    The best choice for your luxury bathroom design is the one that fits your life. If you dream of a daily spa-like shower experience, invest there. If a deep, relaxing soak is your perfect escape from the Houston hustle, the tub is your winner. Whichever stunning feature you choose as your centerpiece, making sure it’s built from the right materials is the next crucial step to ensure it lasts.

    Fighting Houston Humidity: The Best Bathroom Materials That Will Actually Last

    In a city like Houston, a beautiful bathroom remodel is a battle against moisture from the moment it’s finished. This is why material choice is so critical. For countertops, homeowners are increasingly choosing quartz over natural stones like granite or marble. The reason is simple: porosity. Natural stone is porous, meaning it has tiny holes that can absorb water, makeup, and bacteria, leading to stains and potential mold growth in our humid air. In contrast, quartz vs granite bathroom countertops is an easy debate here; engineered quartz is non-porous. It’s a man-made blend of natural stone and resin, creating an impermeable surface that laughs off humidity and spills, making it incredibly durable and easy to keep clean.

    This “don’t-feed-the-moisture” rule is just as important for your floors. While the warmth of hardwood is tempting, it’s a recipe for warping in a steamy bathroom. The solution? Wood-look porcelain tile has become the go-to choice for the best bathroom flooring for houston humidity. Advanced printing technology creates tiles that convincingly mimic the look of real wood grain, but with the bulletproof water resistance of porcelain. You get the cozy, natural aesthetic without ever worrying about water damage or swelling—a perfect marriage of style and practicality for our climate.

    Selecting materials that are built to perform is just as important as how they look. By prioritizing non-porous surfaces and waterproof flooring, you’re not just designing a beautiful space—you’re making a smart, long-term investment. Many of these durable choices, such as long-lasting quartz and porcelain, are also considered sustainable and eco-friendly bathroom materials because they won’t need to be replaced for decades. With these durable surfaces locked in, you can then focus on how to best organize your new, worry-free space.

    Making More Room: Clever Storage Ideas for Every Bathroom Size

    Once you have your durable surfaces sorted, the next challenge is conquering clutter. For years, bulky cabinets have eaten up precious floor space, but one of the most popular solutions in modern bathroom designs is the floating vanity. Instead of resting on the floor, a floating vanity mounts directly to the wall, leaving open space underneath. This simple change has a huge impact, creating an illusion of spaciousness that makes even a tight guest bath feel larger. As a bonus, it makes cleaning the floor a simple, unobstructed task.

    This clever use of space extends right into the shower. Instead of a clunky shower caddy that collects soap scum, homeowners are opting for recessed shelving, often called a “niche.” These are built-in cubbies that sit flush within your tiled wall, providing an elegant and custom-built spot for all your essentials without taking up an inch of elbow room. It’s the perfect answer to the question of how to increase small bathroom storage—by going into the walls instead of hanging things on them.

    These storage trends are about more than just looks; they’re about smarter function. By lifting furniture off the floor and tucking shelves into the walls, you create a room that not only feels bigger and more serene but also works better for your daily routine. With your layout and storage now optimized for a clean, streamlined feel, the next step is to bring that same intelligence to your fixtures and features.

    Beyond the Faucet: Smart Bathroom Tech That’s Actually Worth It

    That same intelligence is now being built directly into your bathroom’s features. The best smart bathroom technology trends aren’t about complicated gadgets; they’re about solving everyday annoyances. Take the smart mirror, for instance. Many now come with a built-in heating element that keeps the surface from fogging up after a shower—a small luxury that makes a huge difference on a humid Houston morning. The same mirrors often include adjustable LED lighting, allowing you to switch from a bright, clear light for getting ready to a soft, warm glow for a more relaxed evening mood.

    Another feature rapidly gaining popularity is radiant in-floor heating. While heated floors might seem unnecessary in our warm climate, their appeal isn’t about heating the room. It’s about comfort. This is one of the ultimate spa-like bathroom features at home, transforming the experience of stepping out of the shower. Instead of a cold, jarring tile, you’re greeted with a gentle, consistent warmth underfoot, adding a touch of five-star hotel luxury to your daily routine.

    These luxury bathroom design ideas for Houston homes focus on practical comfort over novelty. When considering them, ask yourself not “Is this cool?” but “Will this make my morning easier or my evening more relaxing?” This focus on tangible benefits is key. Of course, adding these high-end features will influence your overall investment. So, what do these upgrades really mean for your bottom line?

    What Is the Real Cost? A Realistic Look at Houston Bathroom Remodel Budgets

    Understanding the cost is the first step in turning your dream bathroom into a reality. When homeowners ask, “What is the average cost of a bathroom remodel in Houston?” the answer depends on the scope. A simple cosmetic refresh with new paint and fixtures might land in the $5,000-$10,000 range. A more common mid-range remodel—replacing the vanity, toilet, and tub/shower—typically costs between $15,000 and $30,000. For a high-end, full-gut renovation with luxury features and layout changes, budgets often start at $40,000 and go up from there.

    A critical factor many people overlook is the split between materials and labor. It’s easy to add up the price of that beautiful tile or freestanding tub, but the professional skill required to install everything correctly often accounts for 50% or more of the total project cost. This investment covers the licensed plumbers, electricians, and expert tile setters who ensure your new bathroom is not only beautiful but also safe and built to last.

    Another part of the professional process often involves permits. If your project involves moving walls, relocating plumbing, or significantly altering the electrical wiring, you will almost certainly need Harris County building permits for renovation. This isn’t something you need to navigate alone; a qualified, reputable contractor will manage the entire permitting process to ensure your project is fully compliant with local safety codes.

    Knowing these potential costs is a crucial part of how to plan a bathroom remodel in Texas effectively. It allows you to align your vision with a realistic financial plan, preventing surprises down the road. With a clearer picture of the investment, you can start making informed decisions about which trends and features will deliver the most value for you.

    Your Blueprint for a Better Bathroom: How to Start Planning Today

    From spa-like walk-in showers to smart, humidity-proof materials, the modern Houston bathroom is a true retreat. These trends aren’t just about aesthetics—they’re about building a space that adds daily comfort and lasting value to your home.

    Planning a bathroom remodel in Texas doesn’t have to be overwhelming. A clear path forward involves a few key steps: start an inspiration board with your favorite ideas, set a realistic budget, and begin researching local professionals to find the right partner for your project.

    When checking Houston bathroom renovation contractors reviews, be prepared with your own questions. A great contractor will welcome them:

    • Are you licensed and insured in Texas?
    • Can you show me examples of recent bathroom remodels you’ve completed in my area (e.g., Katy, The Woodlands)?
    • How do you handle project management and communication with homeowners?

    You’re no longer just dreaming of a new bathroom; you’re equipped to start planning it.

  • Best Houston Kitchen Remodelers for 2026

    Best Houston Kitchen Remodelers for 2026

    Embarking on a kitchen remodel is an exciting journey. It transforms the heart of your home into a space that reflects your style.

    In the Heights of Houston, Texas, kitchen renovations are booming. This area is known for its historic charm and vibrant community.

    Choosing the right company for your kitchen remodel is crucial. It ensures a smooth process and a stunning result.

    Om2 reDesign Build stands out as the top choice. They are renowned for their innovative designs and high-quality craftsmanship.

    Their reputation for excellent customer service sets them apart. Clients praise their attention to detail and commitment to satisfaction.

    A kitchen remodel can significantly boost your home’s value. It enhances both functionality and aesthetic appeal.

    Modern trends like open-concept designs and smart appliances are popular. These features create a more inviting and efficient space.

    This guide will help you navigate the best kitchen remodelers in Houston. Discover the top companies and make an informed decision.

    Why Remodel Your Kitchen in the Heights of Houston?

    The Heights of Houston is a vibrant and historically rich area. This makes it a prime location for home renovations, including kitchen remodels.

    A kitchen renovation in the Heights can greatly enhance your home’s value. It also improves functionality, making everyday tasks more enjoyable.

    The community’s diverse cultural influences offer endless inspiration for unique designs. Homeowners have the chance to create kitchens that reflect their personal tastes.

    Remodeling your kitchen in the Heights has practical benefits too. It allows you to update outdated appliances and improve energy efficiency.

    Here are some reasons to remodel your kitchen in the Heights:

    • Increase your home’s resale value
    • Enhance kitchen functionality and efficiency
    • Reflect personal style and taste
    • Incorporate modern appliances and technology
    • Add sustainable and eco-friendly materials

    Whether you’re looking to sell or just want a fresh start, remodeling your kitchen is a wise investment. It transforms your space into the culinary heart of your home.

    How to Choose the Right Kitchen Remodeling Company

    Selecting the right kitchen remodeling company is crucial for a successful renovation. The first step is to identify your specific needs and budget constraints. This will guide your search for the perfect fit.

    Research is key in this process. Start by checking online reviews and ratings. Look for feedback that highlights companies’ strengths and weaknesses. Client testimonials can provide valuable insights into a company’s reliability and service quality.

    It’s also important to verify the credentials of each prospective company. Ensure they have the necessary licenses and insurance. This protects you from liabilities during the renovation process.

    Here are some tips for choosing the right kitchen remodeler:

    • Check online reviews and ratings
    • Verify licenses and insurance
    • Request a portfolio of past projects
    • Schedule in-person consultations
    • Ask about their experience and specialties

    After narrowing down your choices, schedule consultations with the top contenders. These meetings can help you assess their communication style, professionalism, and ability to meet your design expectations.

    Om2 reDesign Build: The #1 Kitchen Remodeler in the Heights

    Om2 reDesign Build stands out as the top choice for kitchen remodeling in the Heights of Houston. Known for their innovative design and exceptional craftsmanship, they transform spaces with a unique touch.

    Their comprehensive approach addresses every aspect of a remodel. They begin with an in-depth consultation to understand clients’ visions and lifestyle needs. This ensures that every project is both personalized and functional.

    Om2 reDesign Build takes pride in using high-quality materials. They focus on sustainable and eco-friendly options, reflecting the latest trends in kitchen renovation. Their designs often blend modern technology with aesthetic appeal, resulting in beautiful and efficient kitchens.

    Collaboration is a cornerstone of their process. They work closely with clients throughout the project, ensuring alignment with the homeowner’s style and preferences. Clients appreciate their ability to adapt to changes and provide timely updates.

    Here are key features of Om2 reDesign Build:

    • Innovative design solutions
    • High-quality, sustainable materials
    • Close client collaboration
    • Emphasis on functionality and aesthetics

    by Jakub Żerdzicki (https://unsplash.com/@jakubzerdzicki)

    They have received numerous awards, recognizing their excellence in design and customer service. Their commitment to completing projects on time and within budget has won them high praise from satisfied clients. Om2 reDesign Build holds a reputation as a trusted leader in the Houston remodeling scene.

    Om2 reDesign Build’s Services and Process

    Om2 reDesign Build offers a full range of services for kitchen renovations. Their holistic approach covers each phase from initial design to final construction. They pride themselves on high-quality work and attention to detail.

    Clients begin their journey with an engaging design consultation. Here, they discuss specific project goals, styles, and budgets. This stage ensures that the resulting design reflects the homeowner’s unique needs and preferences.

    Their services encompass everything needed for a seamless remodel:

    • Design consultations and planning
    • Material selection and sourcing
    • Project management and construction
    • Post-completion support and warranty

    by K O (https://unsplash.com/@kauro)

    The team uses state-of-the-art 3D design software. This tool allows clients to visualize their new kitchen before construction begins. It aids in making informed decisions and adjustments early in the process. Om2 reDesign Build’s process guarantees not only a beautiful design but also a functional space tailored to the client’s daily activities.

    Awards, Reviews, and Client Testimonials

    Om2 reDesign Build has earned various prestigious awards within the remodeling industry. Recognized for their commitment to quality and innovation, these accolades reflect their standing as industry leaders.

    Their success is echoed in the glowing reviews from satisfied clients. Feedback often highlights the team’s professionalism, creative solutions, and high-quality results. Numerous testimonials express appreciation for projects completed on schedule and within budget.

    Clients frequently commend:

    • Innovative and thoughtful design solutions
    • Exceptional communication and project transparency
    • Timely completion of projects
    • Superior quality and customer satisfaction

    These testimonials underline why Om2 reDesign Build remains the premier choice for kitchen remodels in the Heights of Houston.

    Top 5 Kitchen Remodeling Companies in the Heights of Houston, Texas

    Choosing the right kitchen remodeling company involves research and trust. In the Heights of Houston, several companies stand out for their quality and expertise.

    Om2 reDesign Build leads the pack, renowned for its creativity and top-notch service. Their innovative solutions set industry benchmarks, making them the preferred choice for discerning clients.

    Next, Houston Renovation Pros offers a blend of traditional craftsmanship with modern design, appealing to those seeking a balanced style. They are known for their reliability and skillful execution.

    Third, Heights Design Group specializes in contemporary kitchens that seamlessly integrate with home interiors. Their projects often feature sleek lines and minimalist aesthetics.

    Enhance Home Solutions, another top contender, emphasizes eco-friendly designs and sustainable materials. Their commitment to green building appeals to environmentally-conscious homeowners.

    Finally, The Kitchen Studio of Houston is praised for its custom cabinetry and unique finishes. Their attention to detail has earned them a loyal client base.

    Key highlights of these companies include:

    • Om2 reDesign Build: Innovation and quality
    • Houston Renovation Pros: Craftsmanship and consistency
    • Heights Design Group: Sleek and contemporary designs
    • Enhance Home Solutions: Eco-friendly materials and designs
    • The Kitchen Studio of Houston: Custom cabinetry and finishes

    Company Profiles: Strengths and Specialties

    Each of these leading companies brings unique strengths to the table, offering clients a variety of options for their kitchen remodels.

    Om2 reDesign Build excels in personalized projects, ensuring that every design suits the homeowner’s preferences. Their commitment to quality craftsmanship and innovative design sets them apart.

    Houston Renovation Pros is known for high-quality restorations. They excel in blending the old with the new, providing clients with a harmonious outcome.

    Heights Design Group focuses on modern aesthetics. They cater to those who favor clean lines and cutting-edge design elements in their kitchens.

    Enhance Home Solutions stands out for their sustainable designs. Their use of eco-friendly materials attracts clients focused on reducing environmental impacts.

    The Kitchen Studio of Houston specializes in custom solutions. Their proficiency in crafting unique cabinetry allows them to create kitchens that reflect the homeowner’s individuality.

    Here’s a summary of each company’s specialties:

    • Om2 reDesign Build: Tailored designs and quality
    • Houston Renovation Pros: Restoration excellence
    • Heights Design Group: Modern aesthetics
    • Enhance Home Solutions: Sustainability
    • The Kitchen Studio of Houston: Custom cabinetry

    These companies provide a diverse range of options for homeowners in the Heights, ensuring every project meets client expectations and delivers stunning results.

    Trends in Kitchen Renovation Houston Homeowners Love

    Kitchen renovations in Houston reflect both practicality and modern aesthetics. Homeowners are increasingly embracing open-concept designs to create a seamless flow between cooking and living spaces.

    Smart appliances are another favored trend. These help save energy and add convenience, aligning with the tech-savvy demands of today’s households. Homeowners seek efficiency without sacrificing style.

    Natural materials have also become popular in recent years. Elements like stone and wood bring warmth and texture to kitchens, making them more inviting and earthy. The aesthetic appeal of these materials complements various architectural styles.

    Color schemes are shifting toward muted tones and natural hues. Shades of grey, white, and soft blues are dominating kitchen renovations, conveying a sense of calm and sophistication. This palette choice enhances the kitchen’s versatility and timelessness.

    Incorporating these trends can significantly impact the functionality and beauty of a kitchen. Here’s a list summarizing the trends:

    • Open-concept layouts
    • Smart appliances
    • Natural materials
    • Muted color palettes

    by Clay Banks (https://unsplash.com/@claybanks)

    What to Expect: Kitchen Remodel Timeline and Budget

    Embarking on a kitchen remodel involves navigating timelines and budgets. Having clear expectations can ease stress and aid in planning.

    Typically, kitchen renovations span several weeks to a few months. The duration depends on the scope and complexity of the project. Simple updates take less time, while large-scale changes require more.

    Budgeting is equally crucial. Costs vary widely based on materials and design preferences. It’s wise to allocate funds for unforeseen expenses, ensuring flexibility.

    To manage expectations, consider these key aspects:

    • Define your budget and stick to it.
    • Anticipate the project timeline, allowing for possible delays.
    • Prioritize quality materials and experienced contractors.

    Effective communication with your remodeler helps keep the project on track. Clear discussions about costs and timelines prevent misunderstandings.

    Frequently Asked Questions About Houston Kitchen Remodels

    Homeowners often have many questions when planning a kitchen remodel in Houston. Let’s address a few common inquiries to clarify the process.

    How long does a kitchen remodel take?
    Timelines vary, but most projects take 4-12 weeks. This depends on the scope of work and any custom elements involved.

    What is the average cost of a Houston kitchen remodel?
    Typical kitchen renovations range from $15,000 to $50,000 or more. The total depends on material choices and labor rates.

    Are permits necessary for kitchen renovations in Houston?
    Yes, major changes require permits. It’s best to consult with your contractor regarding specific needs.

    How can I save money on my kitchen renovation?
    Consider refacing instead of replacing cabinets. Choose cost-effective materials for floors and countertops.

    Here’s a quick checklist:

    • Determine your needs and preferences.
    • Set a realistic budget for the project.
    • Consult with reliable contractors.
    • Verify necessary permits and approvals.
    • Plan for temporary kitchen setups.

    Understanding these essentials can streamline your kitchen remodeling journey, ensuring less hassle and more excitement.

    Conclusion: Start Your Kitchen Renovation Journey

    Embarking on a kitchen renovation in the Heights of Houston can be a rewarding adventure. With the right guidance, your dream kitchen is within reach. Carefully choose a remodeler who understands your vision and exceeds your expectations.

    Om2 reDesign Build, leading the pack, combines innovative design with high-quality craftsmanship. Their commitment to client satisfaction sets them apart as the top choice for your remodeling needs. With them, your kitchen will shine in both function and style.

    Explore current trends and stay informed about what to expect in terms of timeline and budget. This knowledge empowers you to make smart decisions. Begin your kitchen renovation journey today with confidence and creativity, transforming your space into the heart of your home.